Overview
The FELG Dent integration connects FELG Dent with DentalMonitoring so that patient data and monitoring status flow between the two platforms without double entry.
- Patient creation: create new patients in DentalMonitoring directly from FELG Dent.
- Patient pairing: link existing FELG Dent patients to their DentalMonitoring profile.
- Monitoring controls: start and stop monitoring from within FELG Dent.
- DM patient shortcut: Open a patient's DentalMonitoring card straight from FELG Dent's Treatment Card.
Setup your FELG Dent integration
Prerequisites
- A DM API Key. If you have not done so already, generate your DM API Key.
- Your FELG Dent user needs Admin permissions in FELG to carry out the setup process.
Setup
-
In the FELG Dent interface, click on the Gear icons next to the Administraition tab, scroll down, then click on DentalMonitoring:
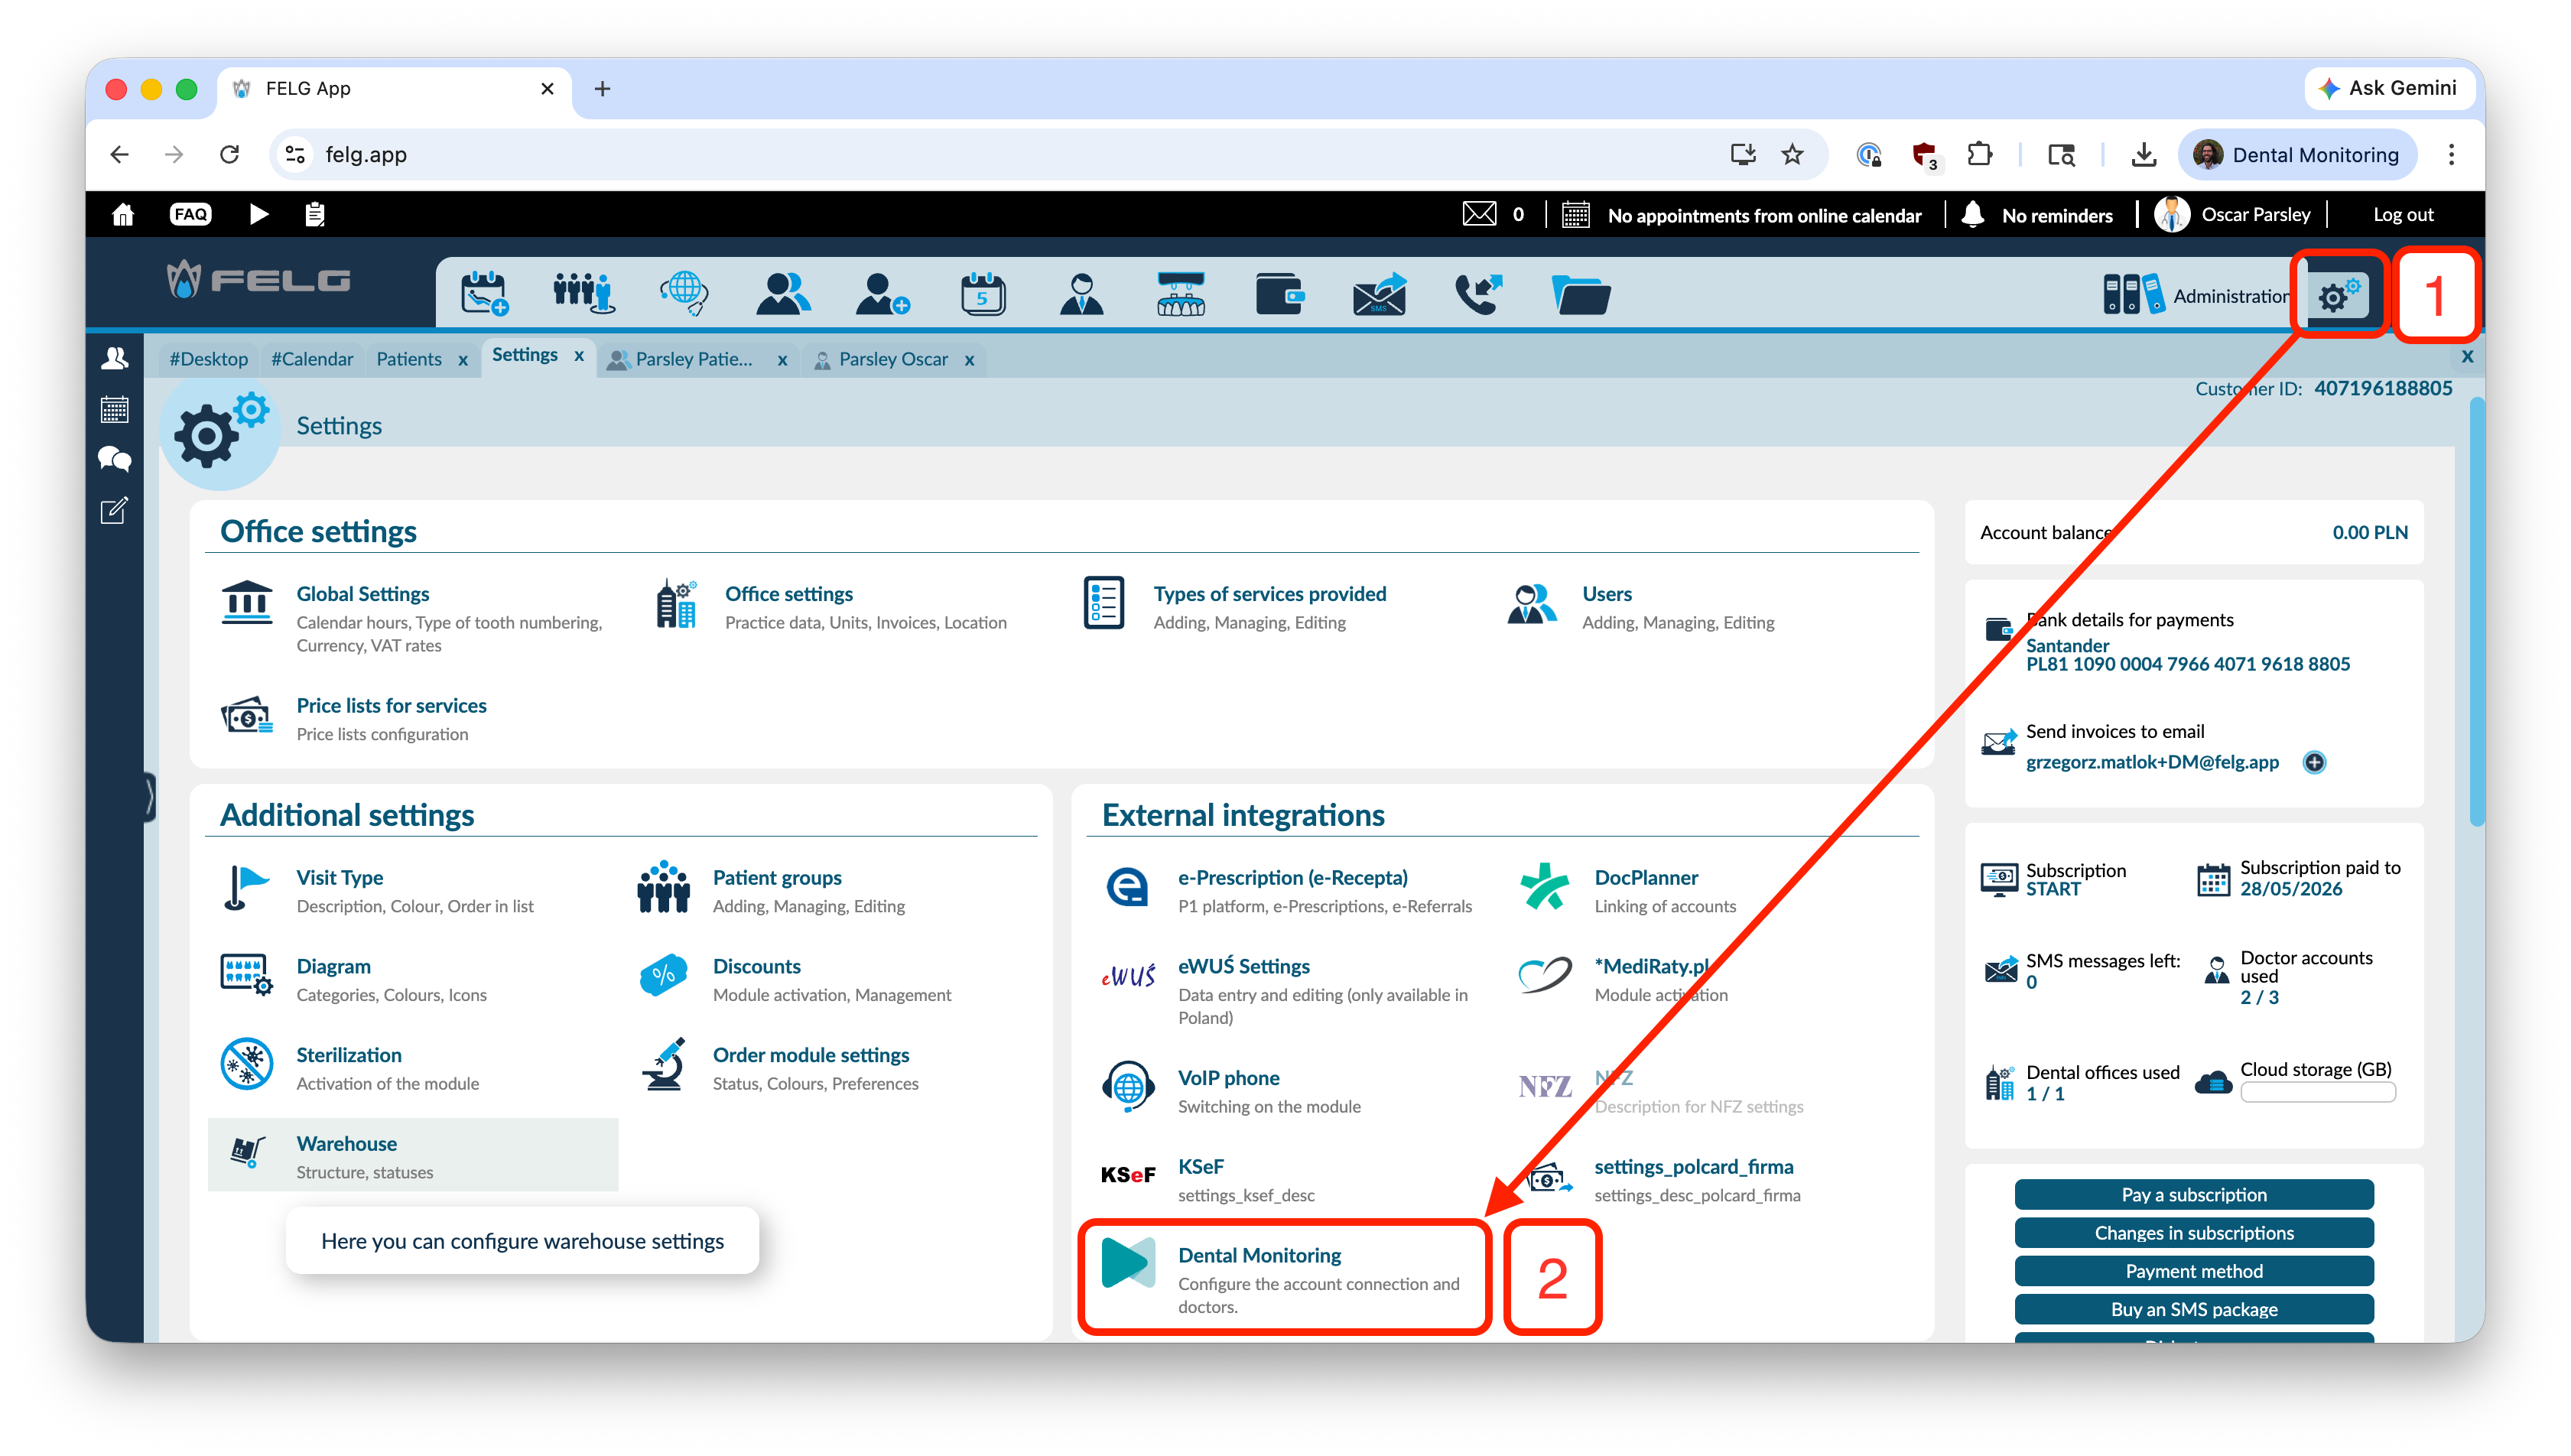
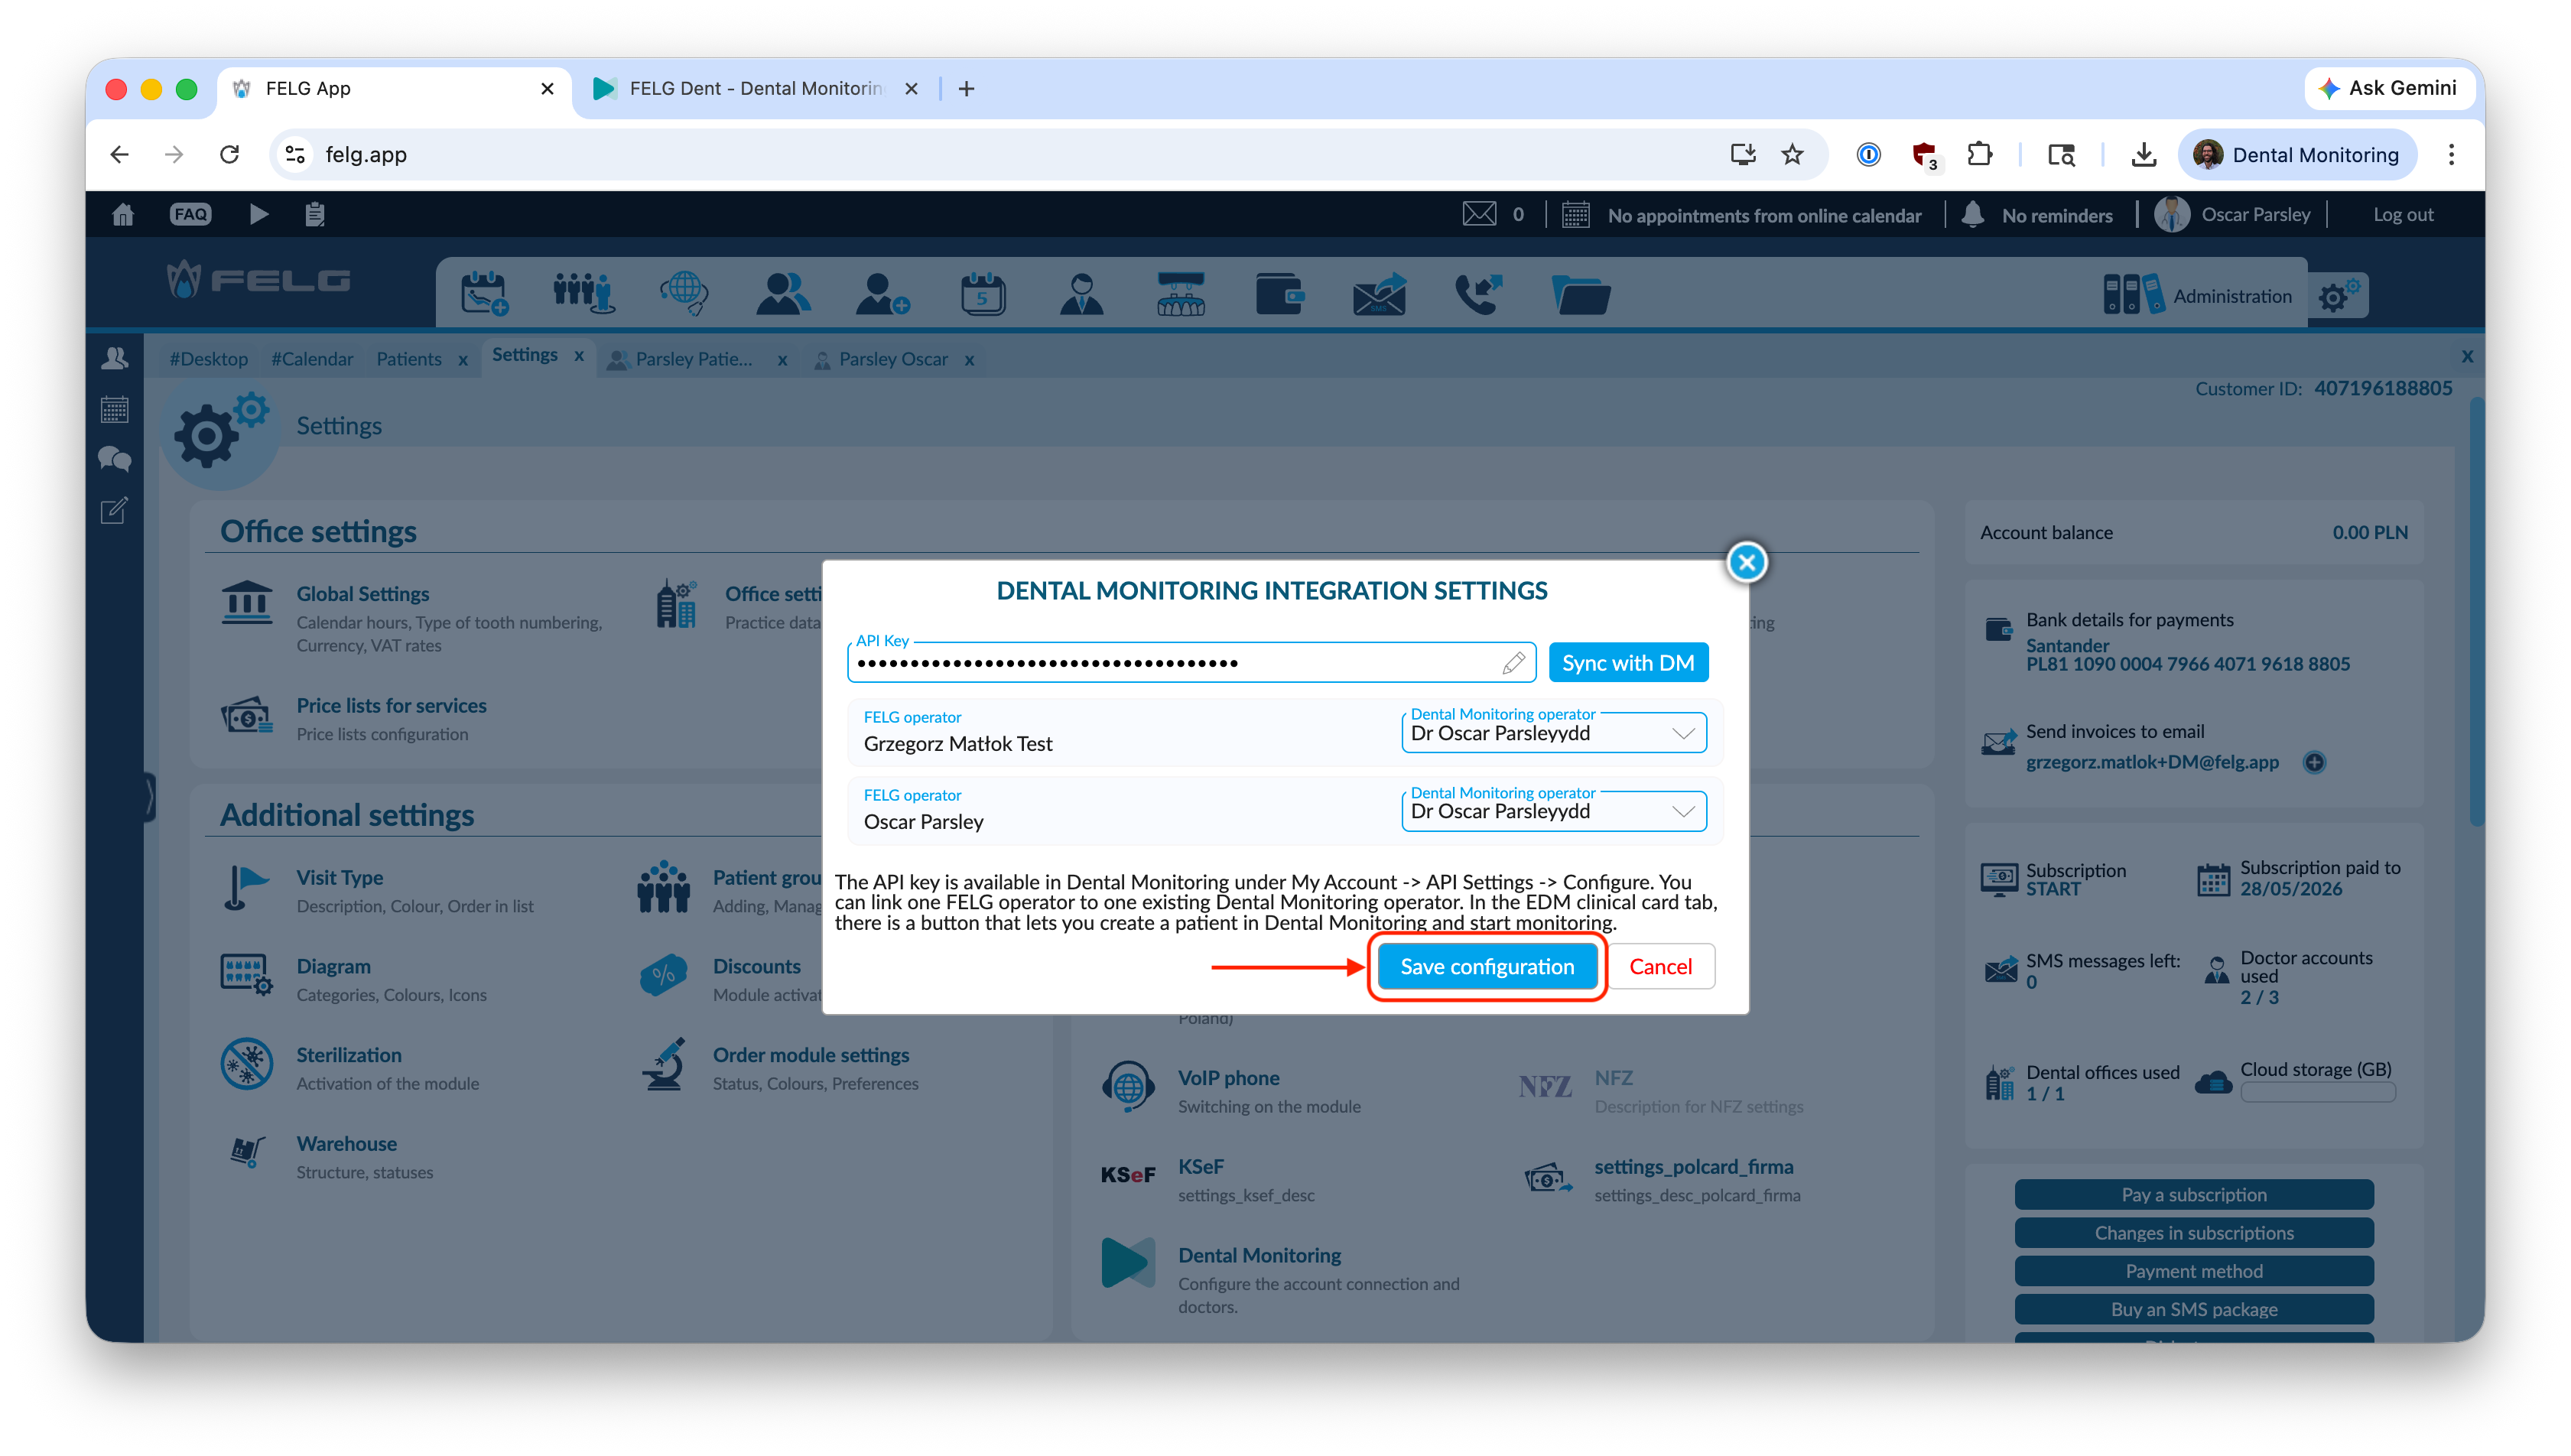
The DentalMonitoring setup window will appear.
-
Paste your DM API Key into the
API Keyfield then click onSync with DM: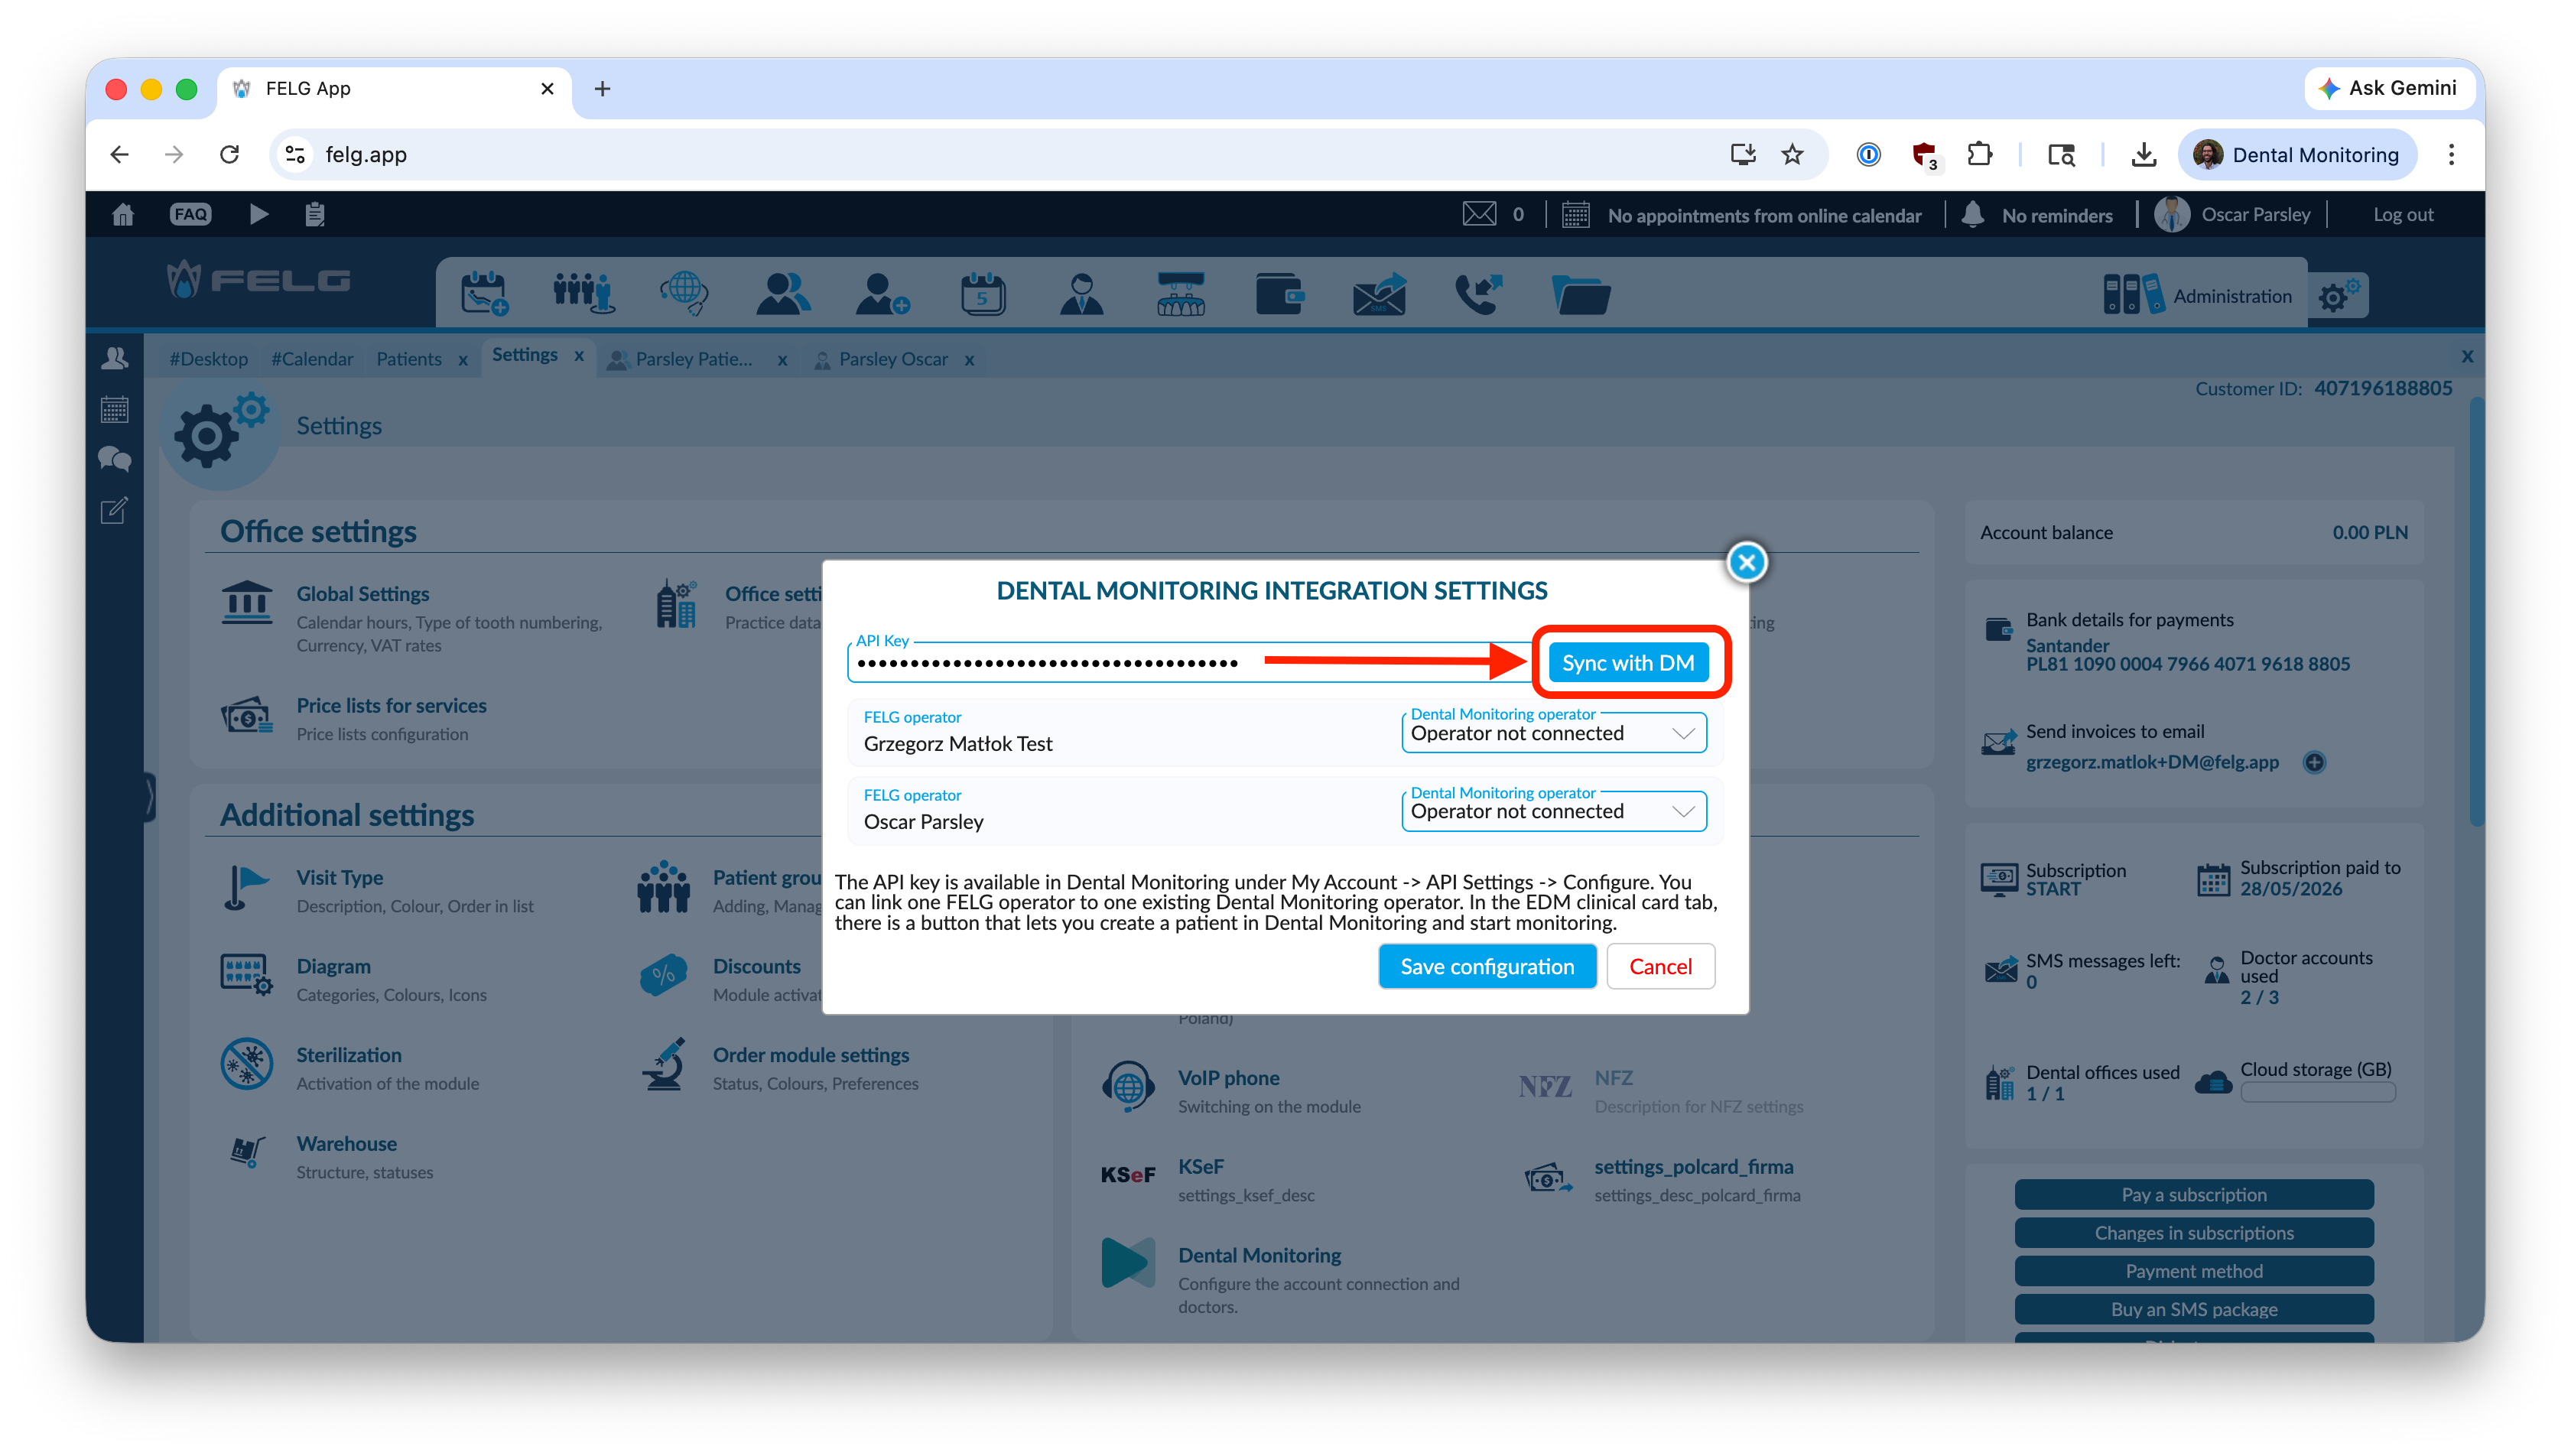
-
If the sync is succesful, you will see the following message:
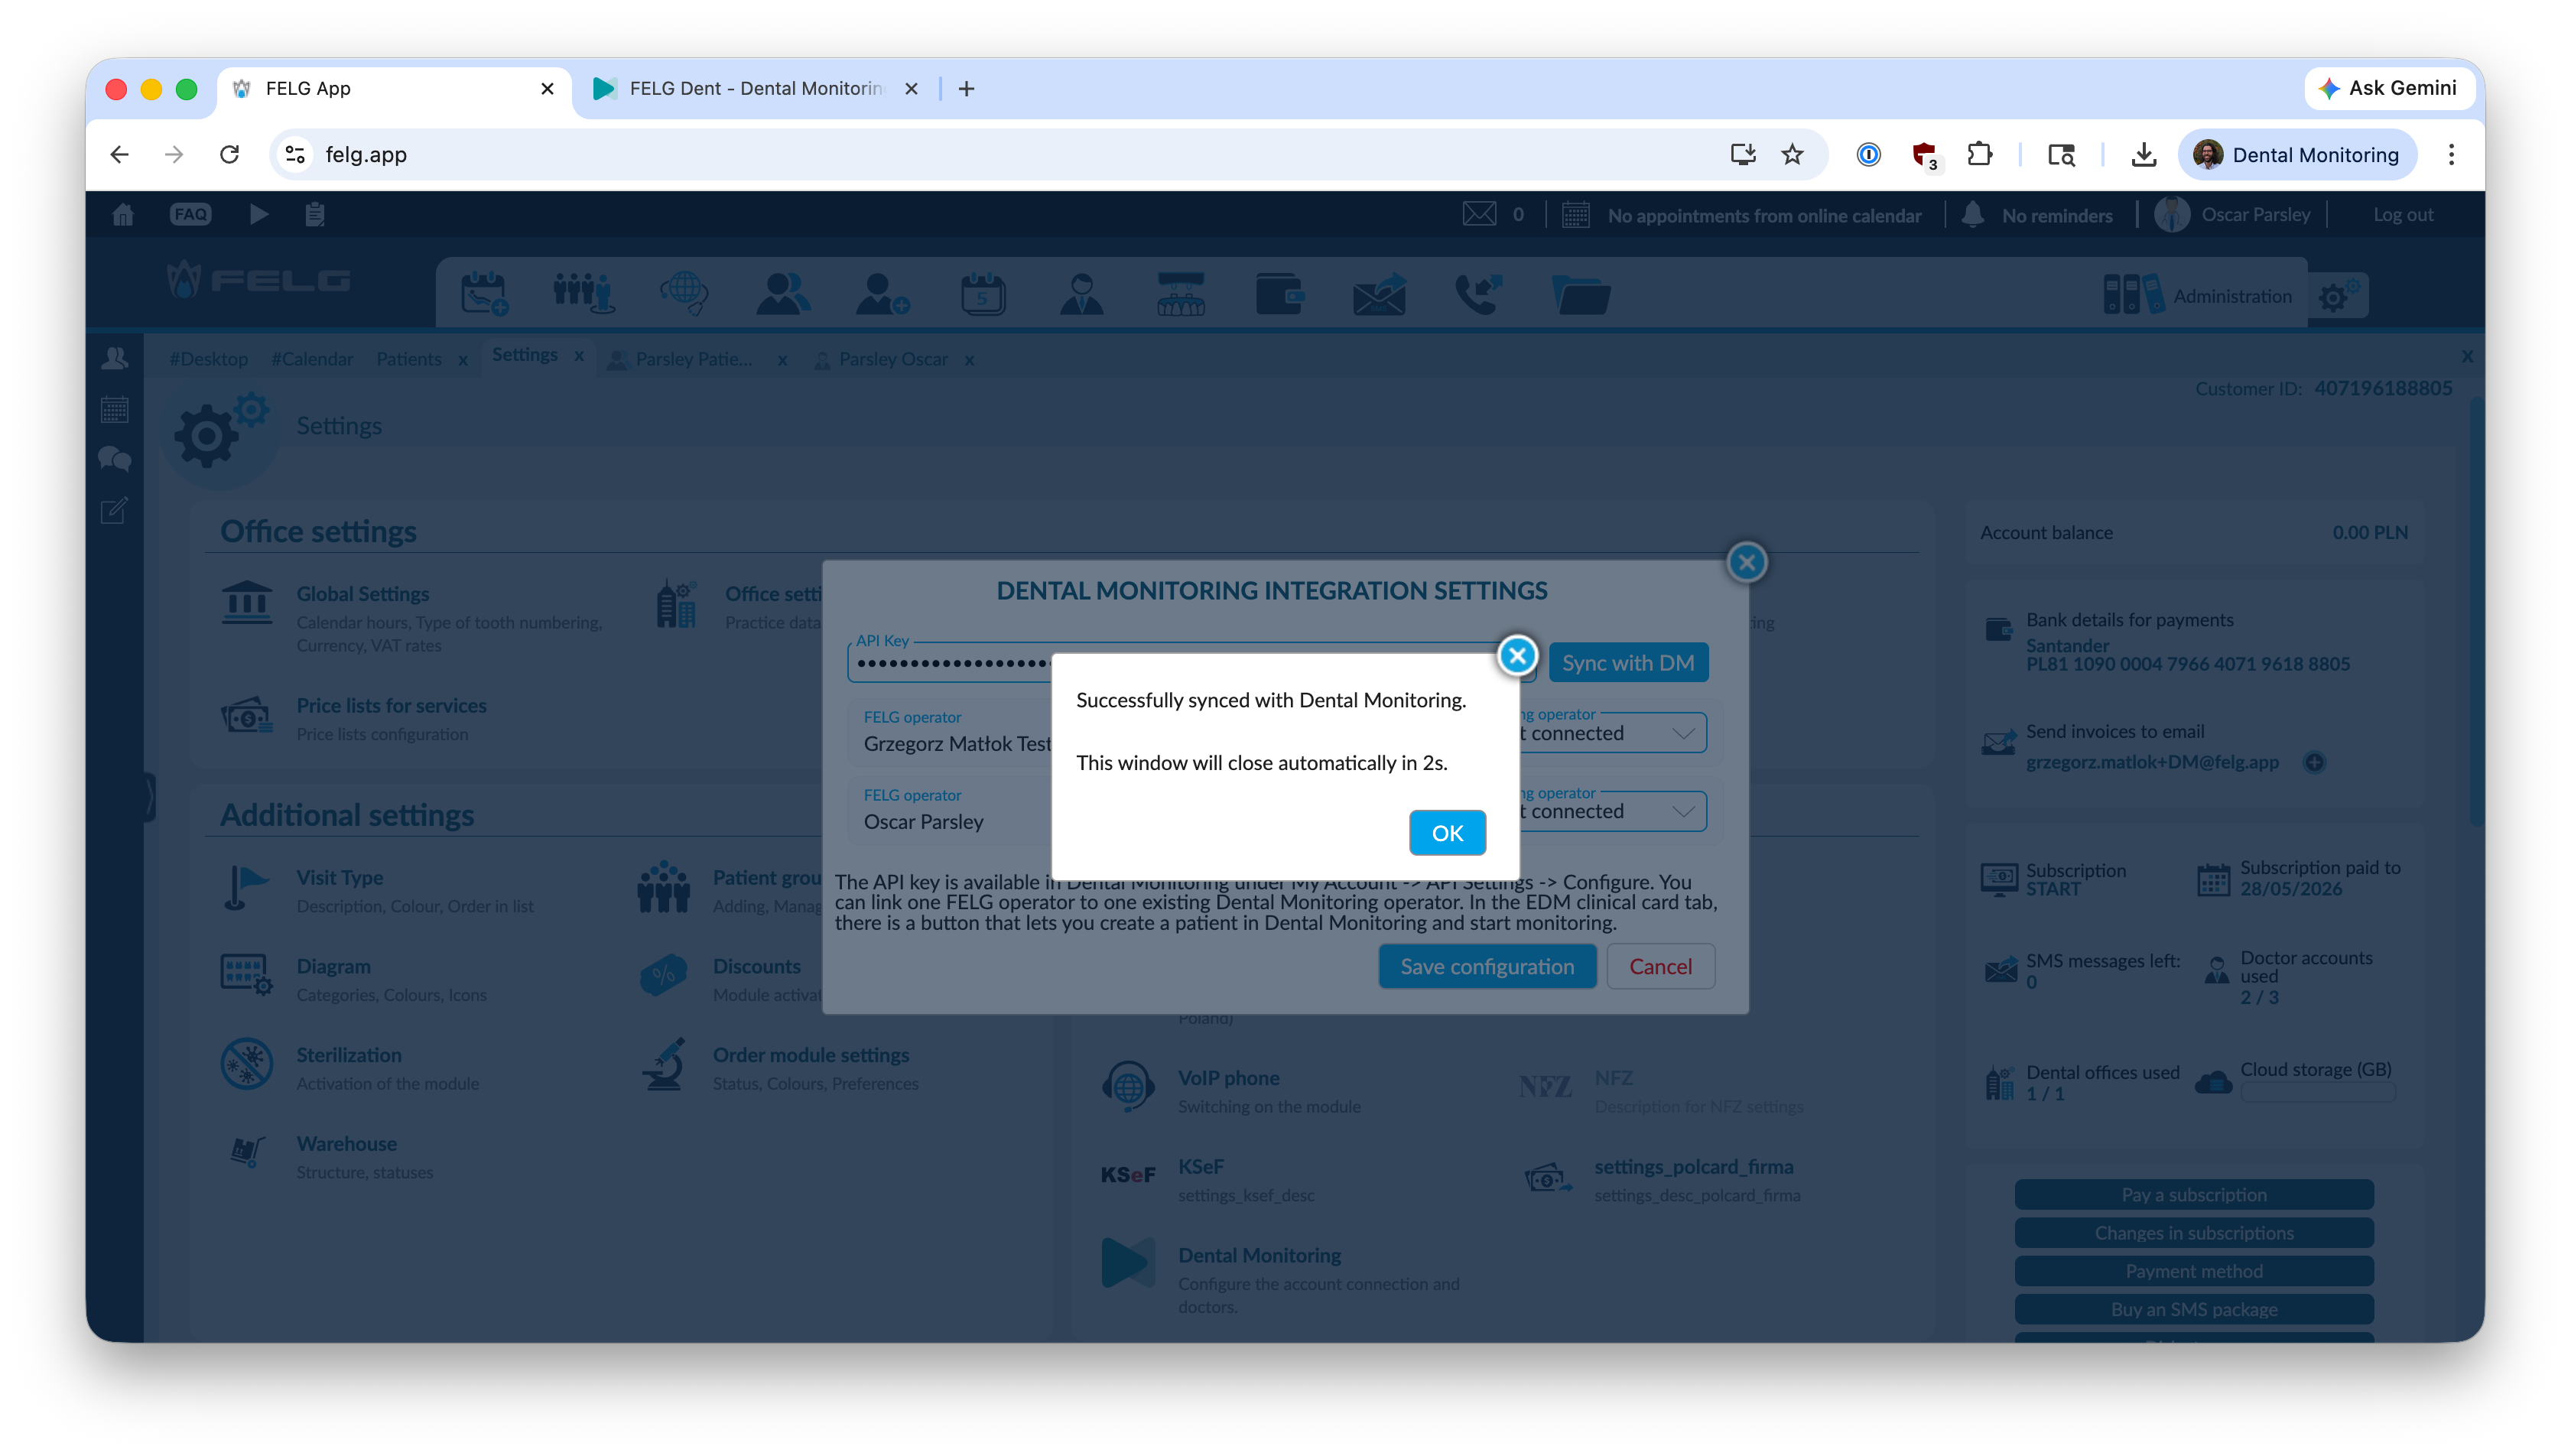
-
You then need to map one FELG Dent operator to the DentalMonitoring doctor account. In most cases, there will only be one option in the list.

One FELG Operator only
Only one FELG Operator can be associated to each Dental Monitoring account.
-
Once you are finished, click "Save configuration".
That's it ! Your FELG Dent x DentalMonitoring integration is ready to use.
Usage
Patient creation
To create a new patient in DentalMonitoring from FELG Dent, follow the instructions below.
Prerequisites
The patient must have an Email and a Phone number in FELG Dent to be able to be created in DM. Trying to create
a patient from FELG in DM wihtout an email or phone number will yield an error message.
Note: You can create patients without an email or phone number in the DM Dashboard directly, this constrain only applies to the integration.
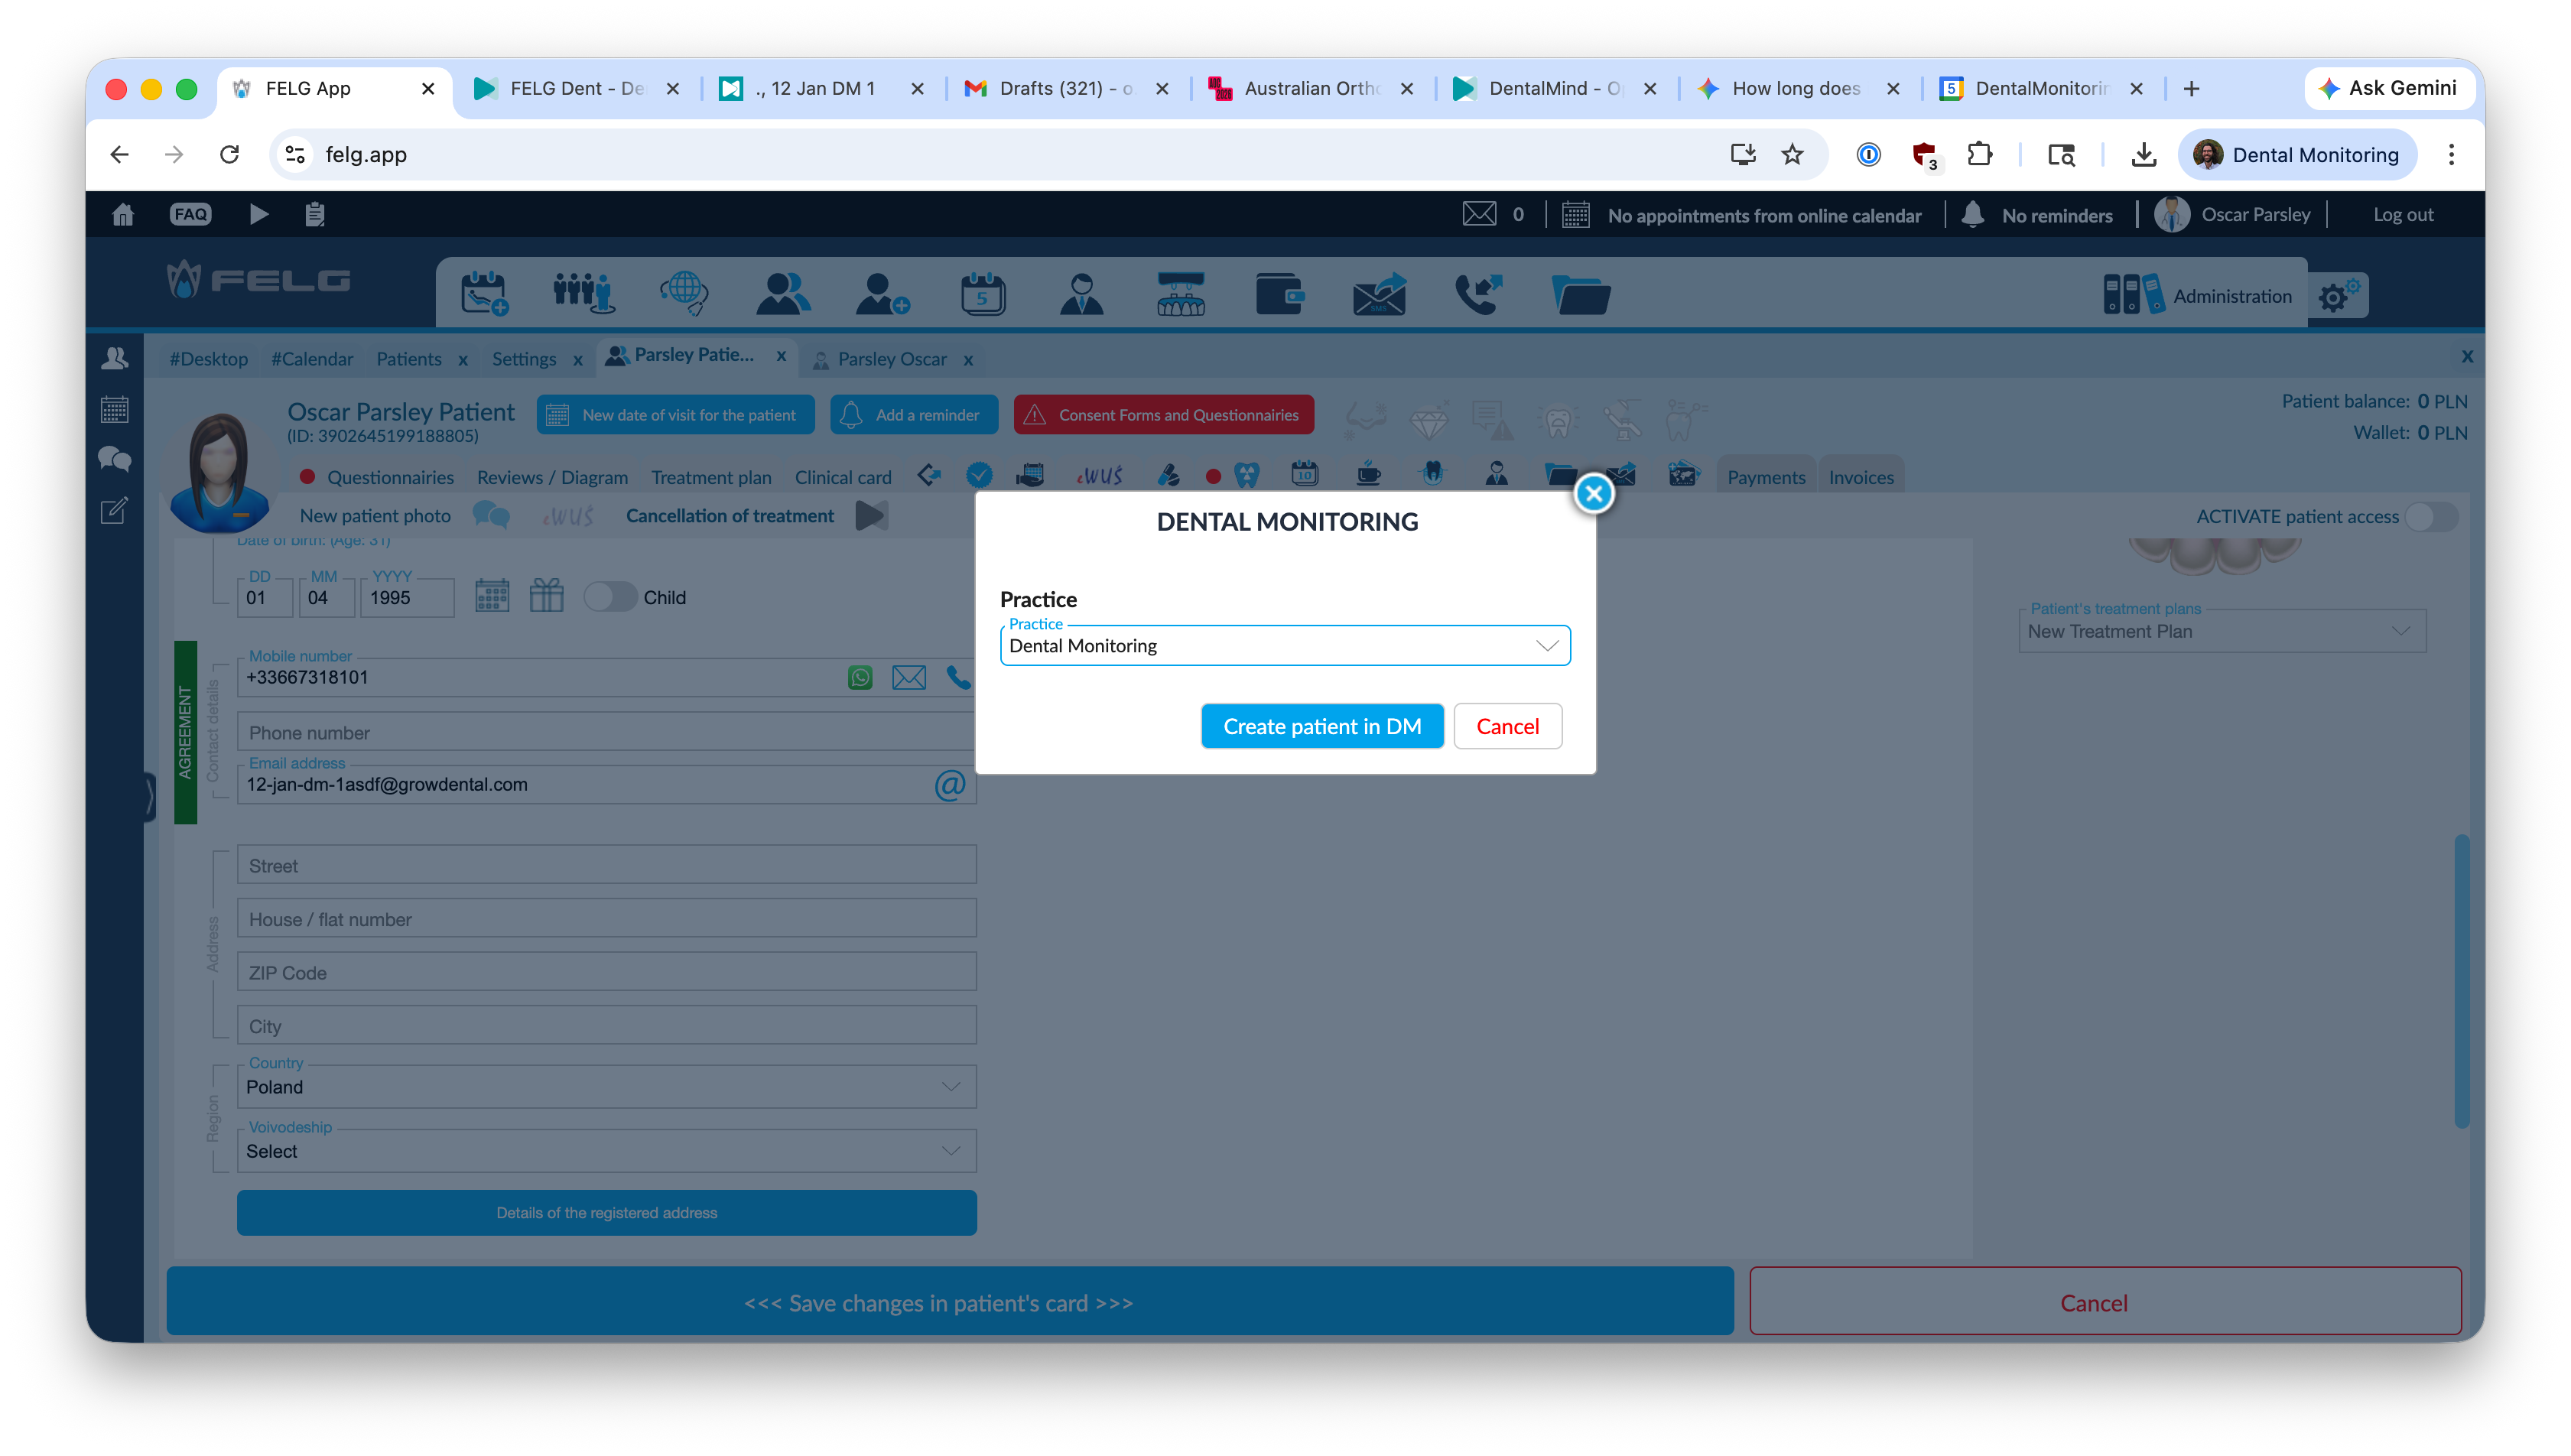
Click on the greyed out DentalMonitoring icon at the top of the patient card. A dialog will open up to select which DM Practice to create the patient in:
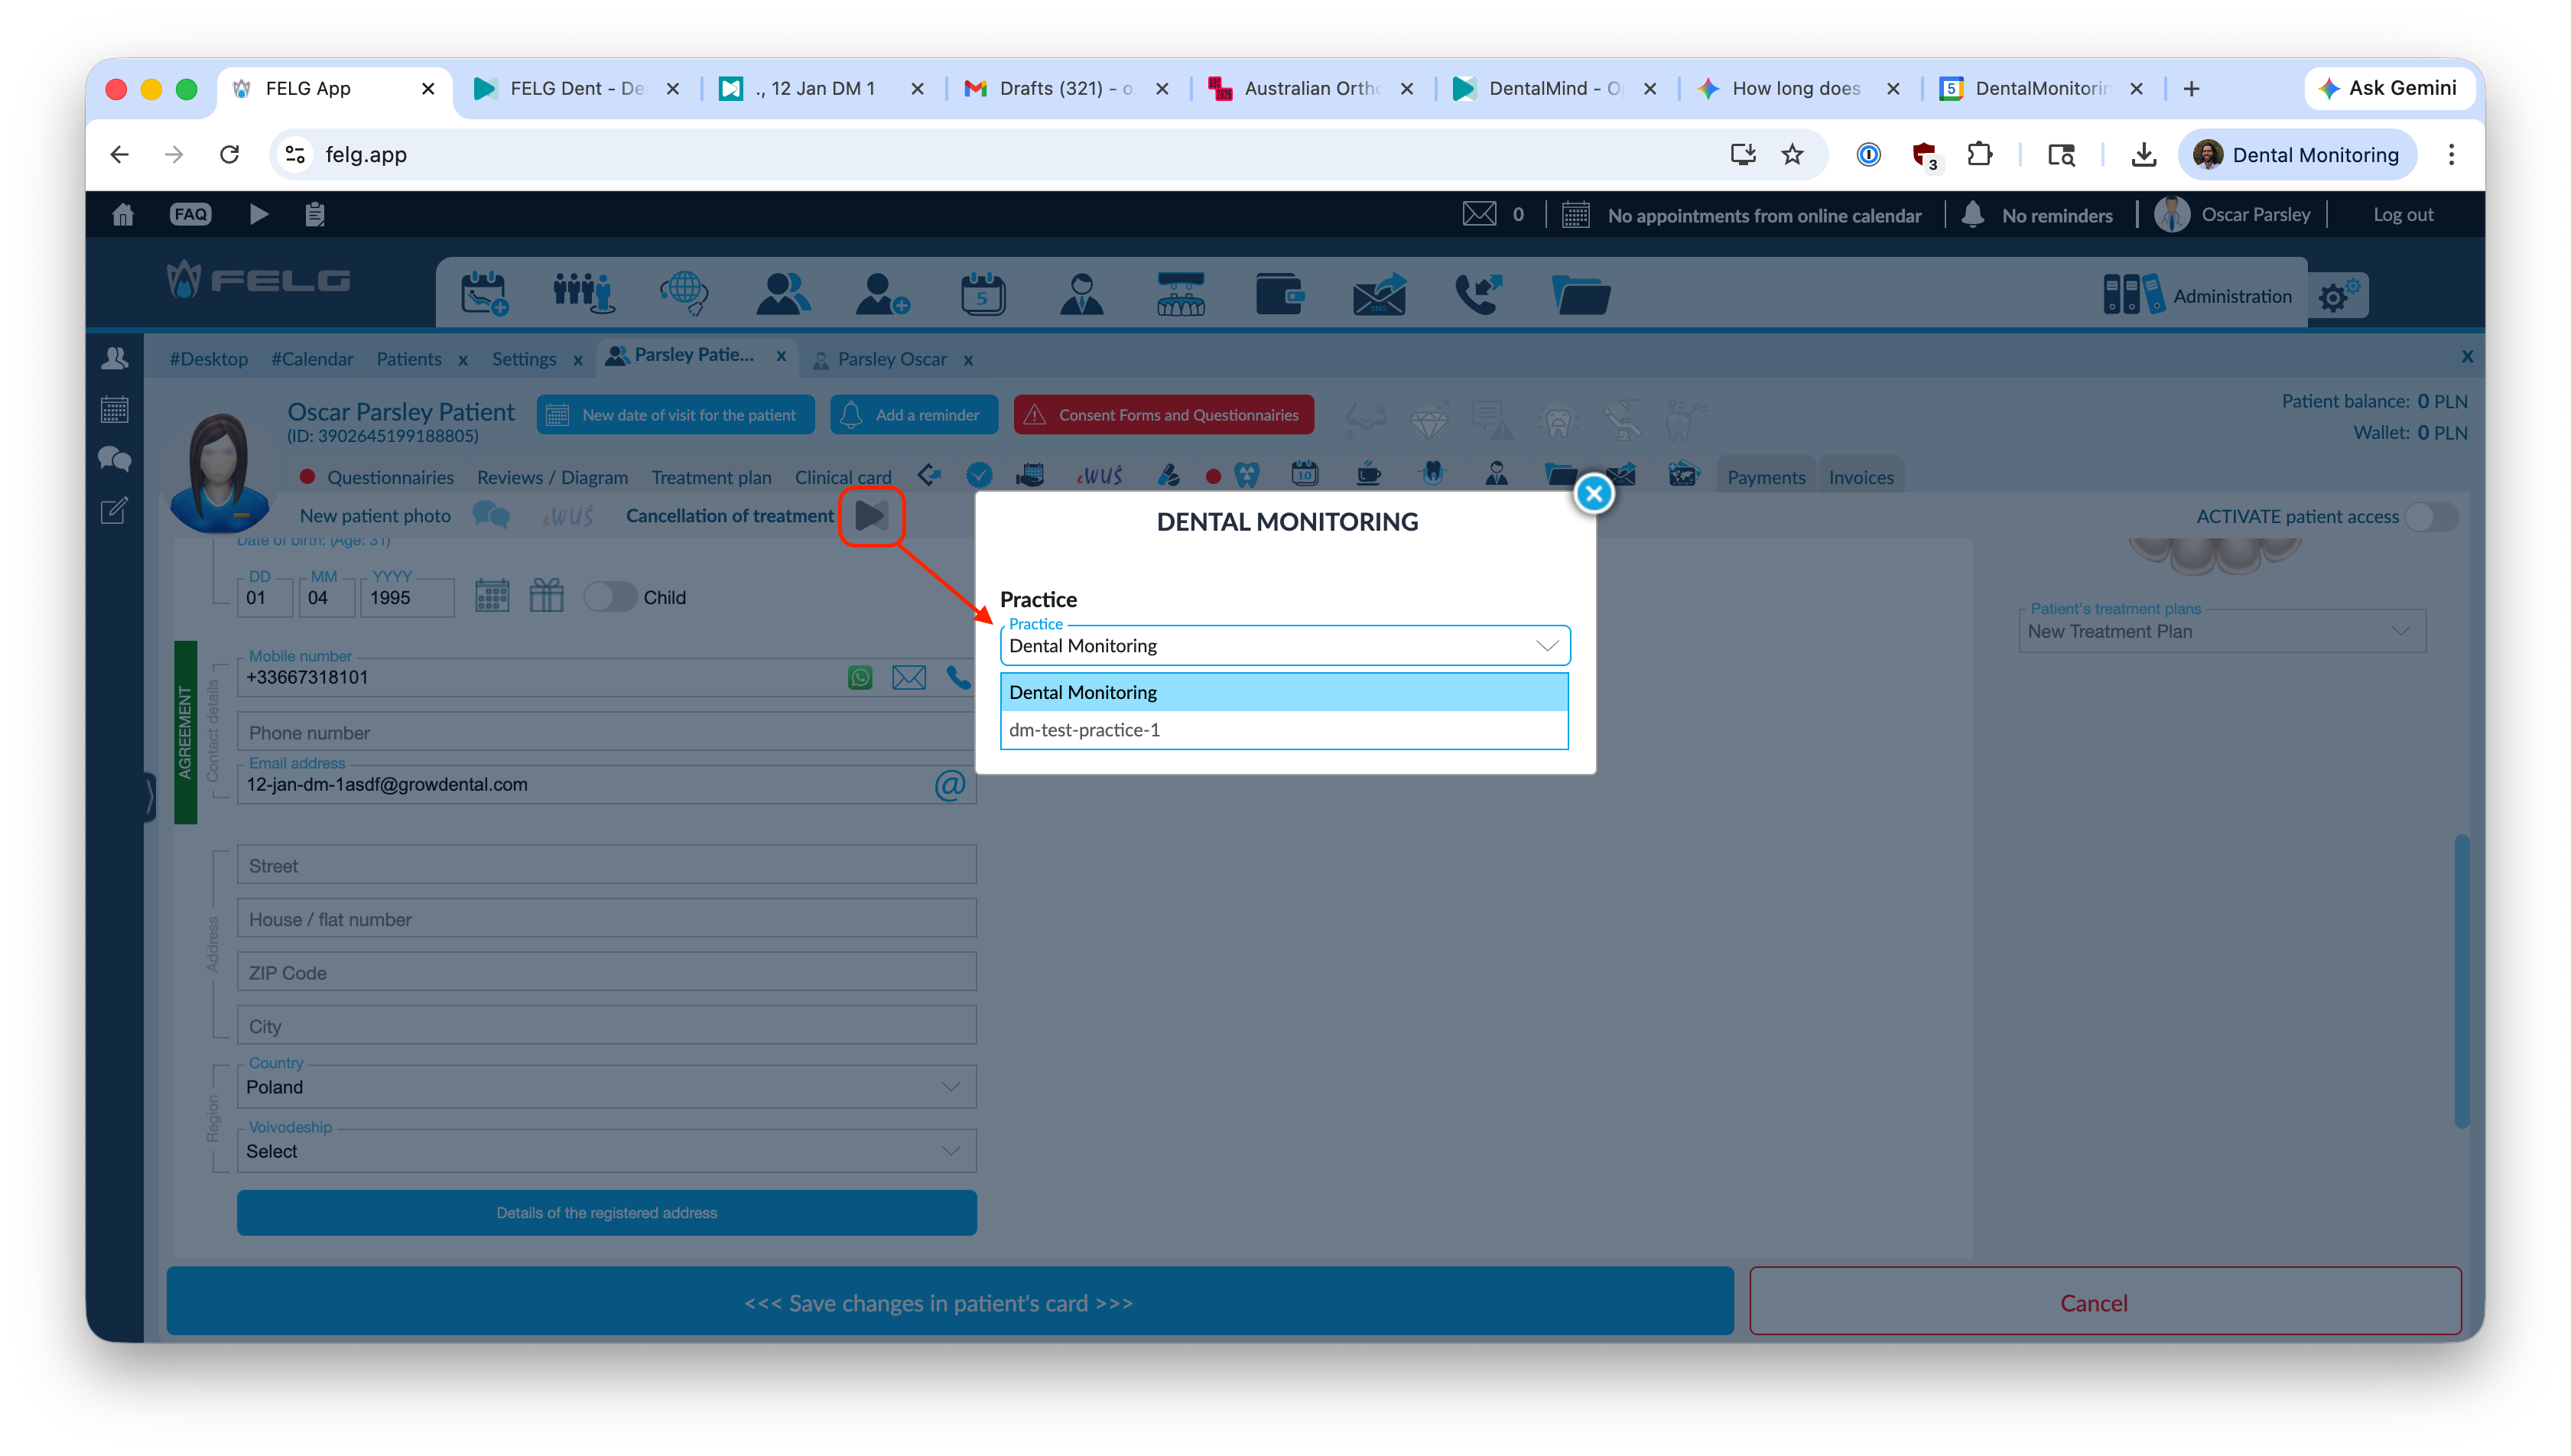
Select the practice then click Create Patient in DM.
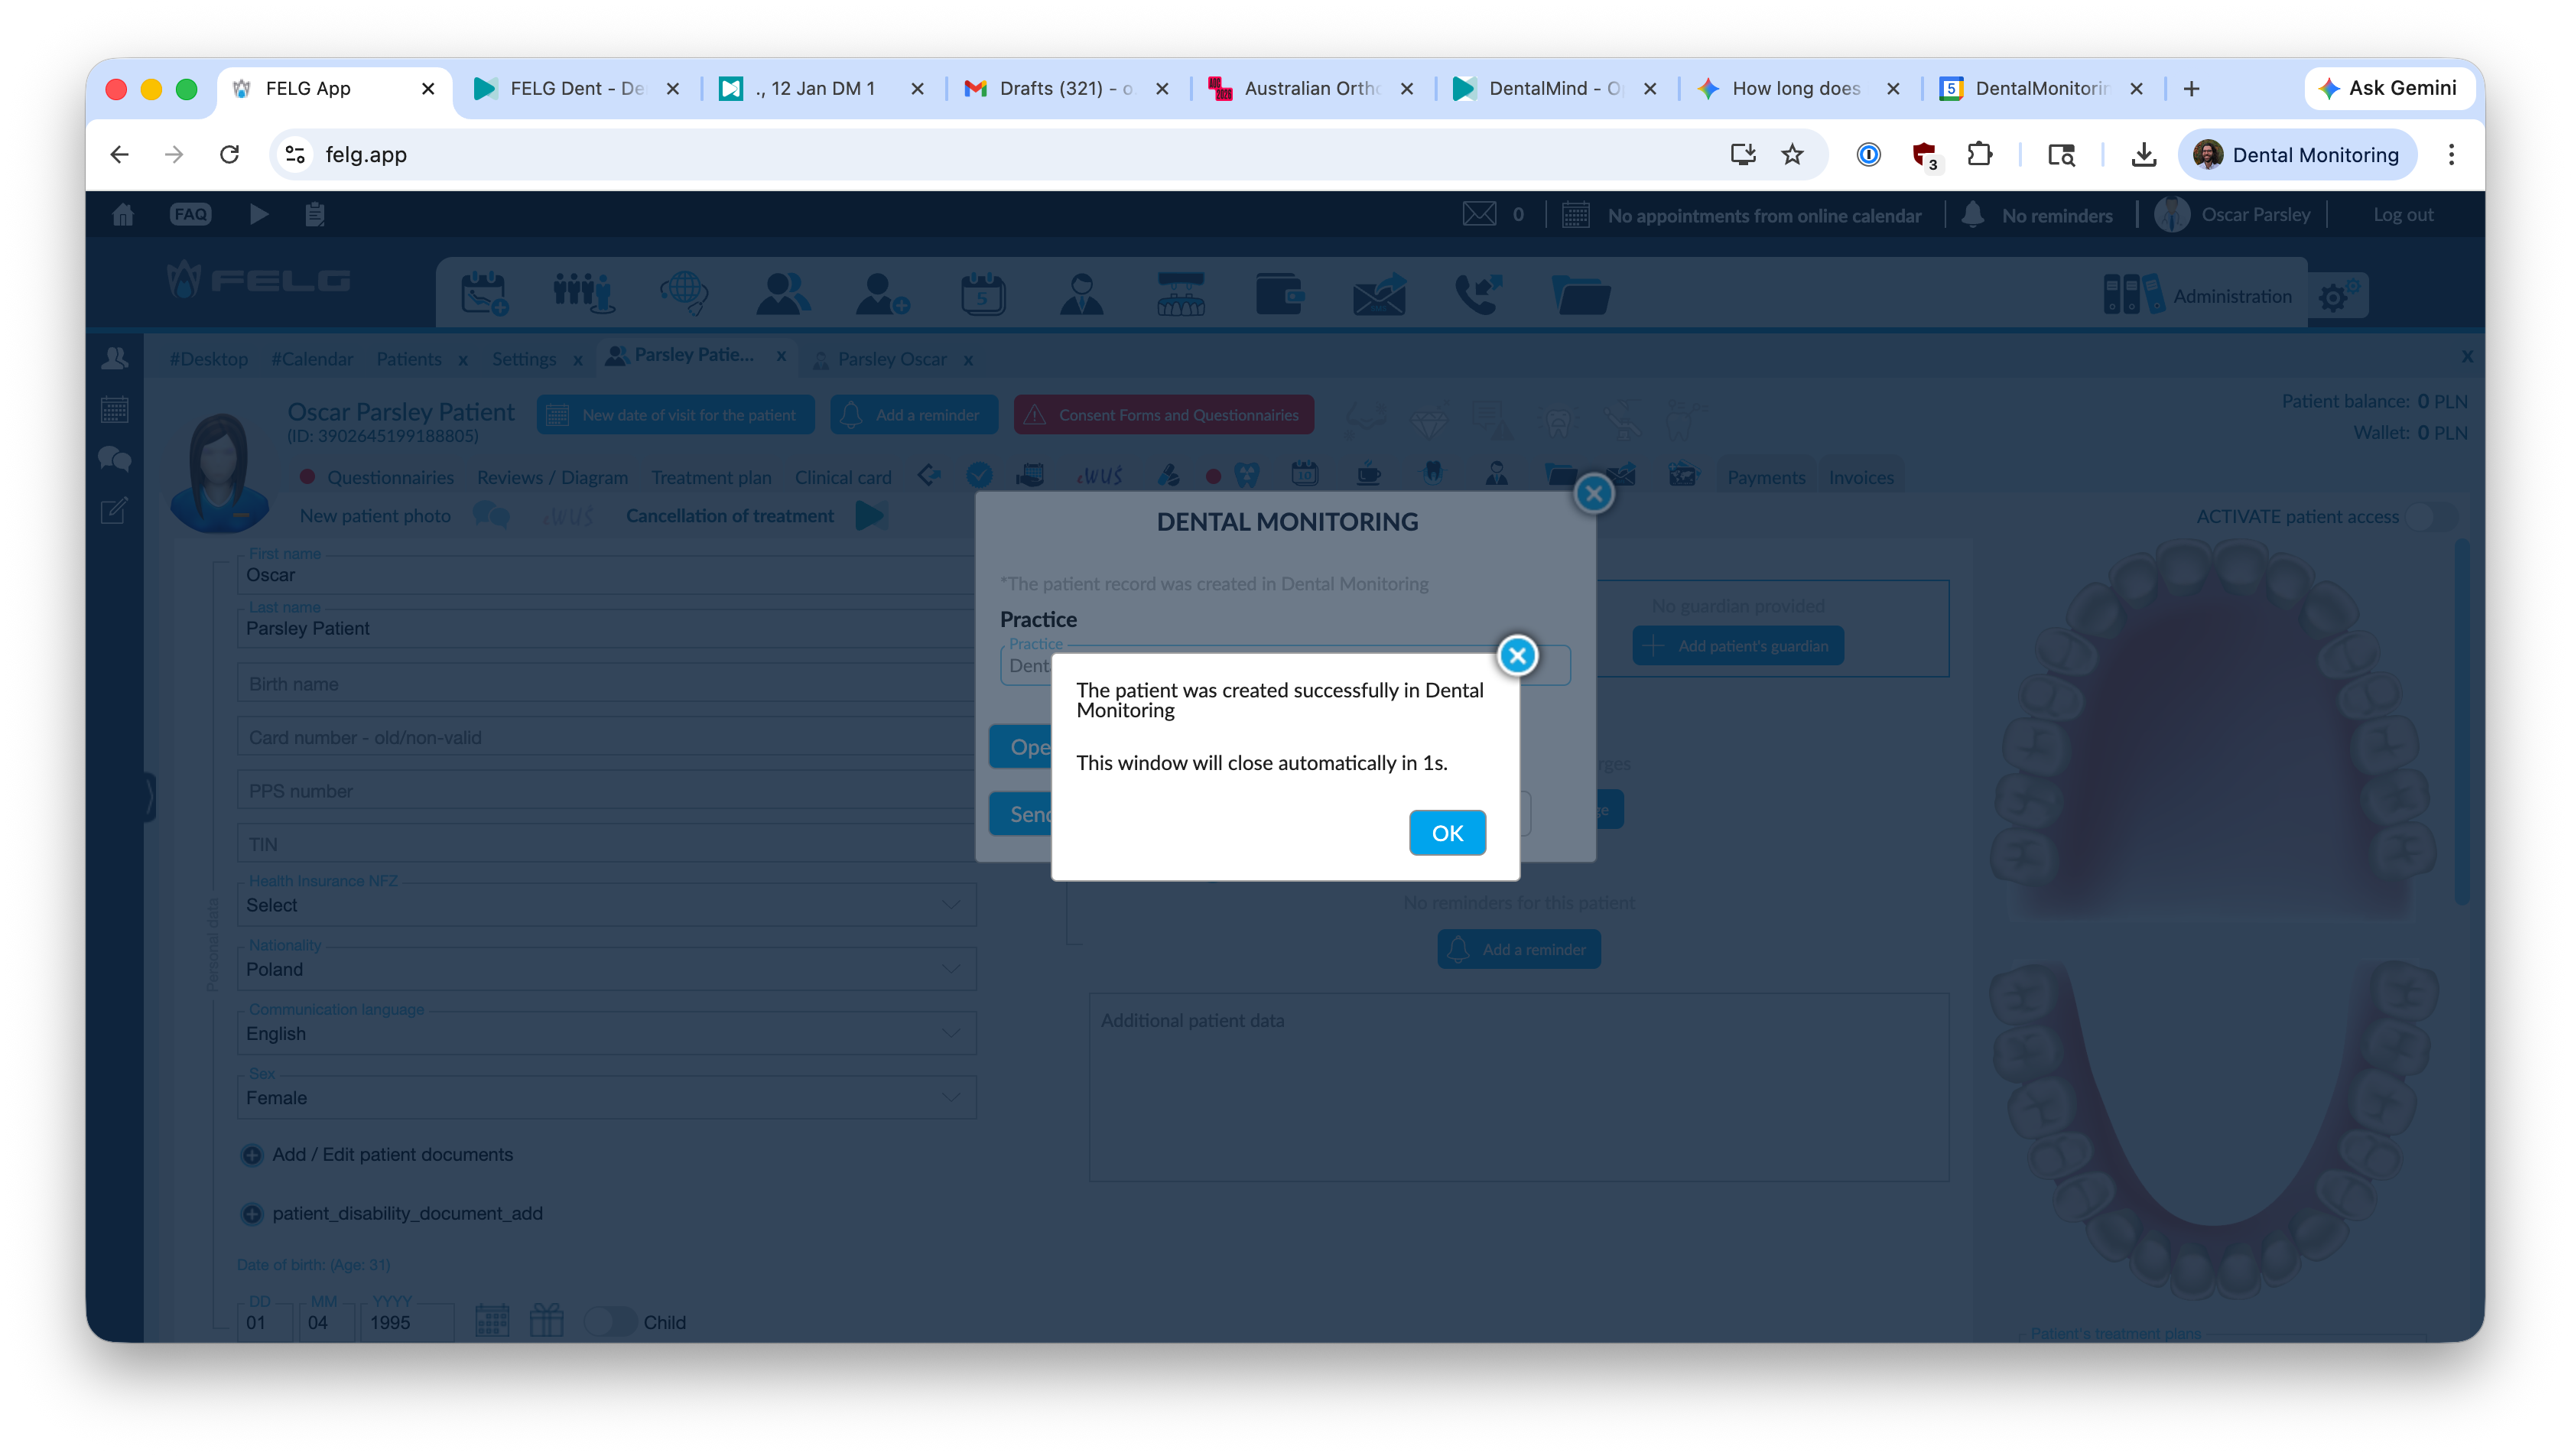
You will then see the following confirmation screen:
Patient synchronisation
To synchronise an existing patient in DentalMonitoring with a FELG Dent patient, follow the instructions below.
First, make sure that the patient in DentalMonitoring and the patient in FELG Dent have the same email address.
Then, simply follow the same steps as the Patient creation process. When you get to the Create patient step, the system will detect that a patient in DM already has the same email address, and will ask you if
you want to synchronise the FELG Dent patient with that patient:
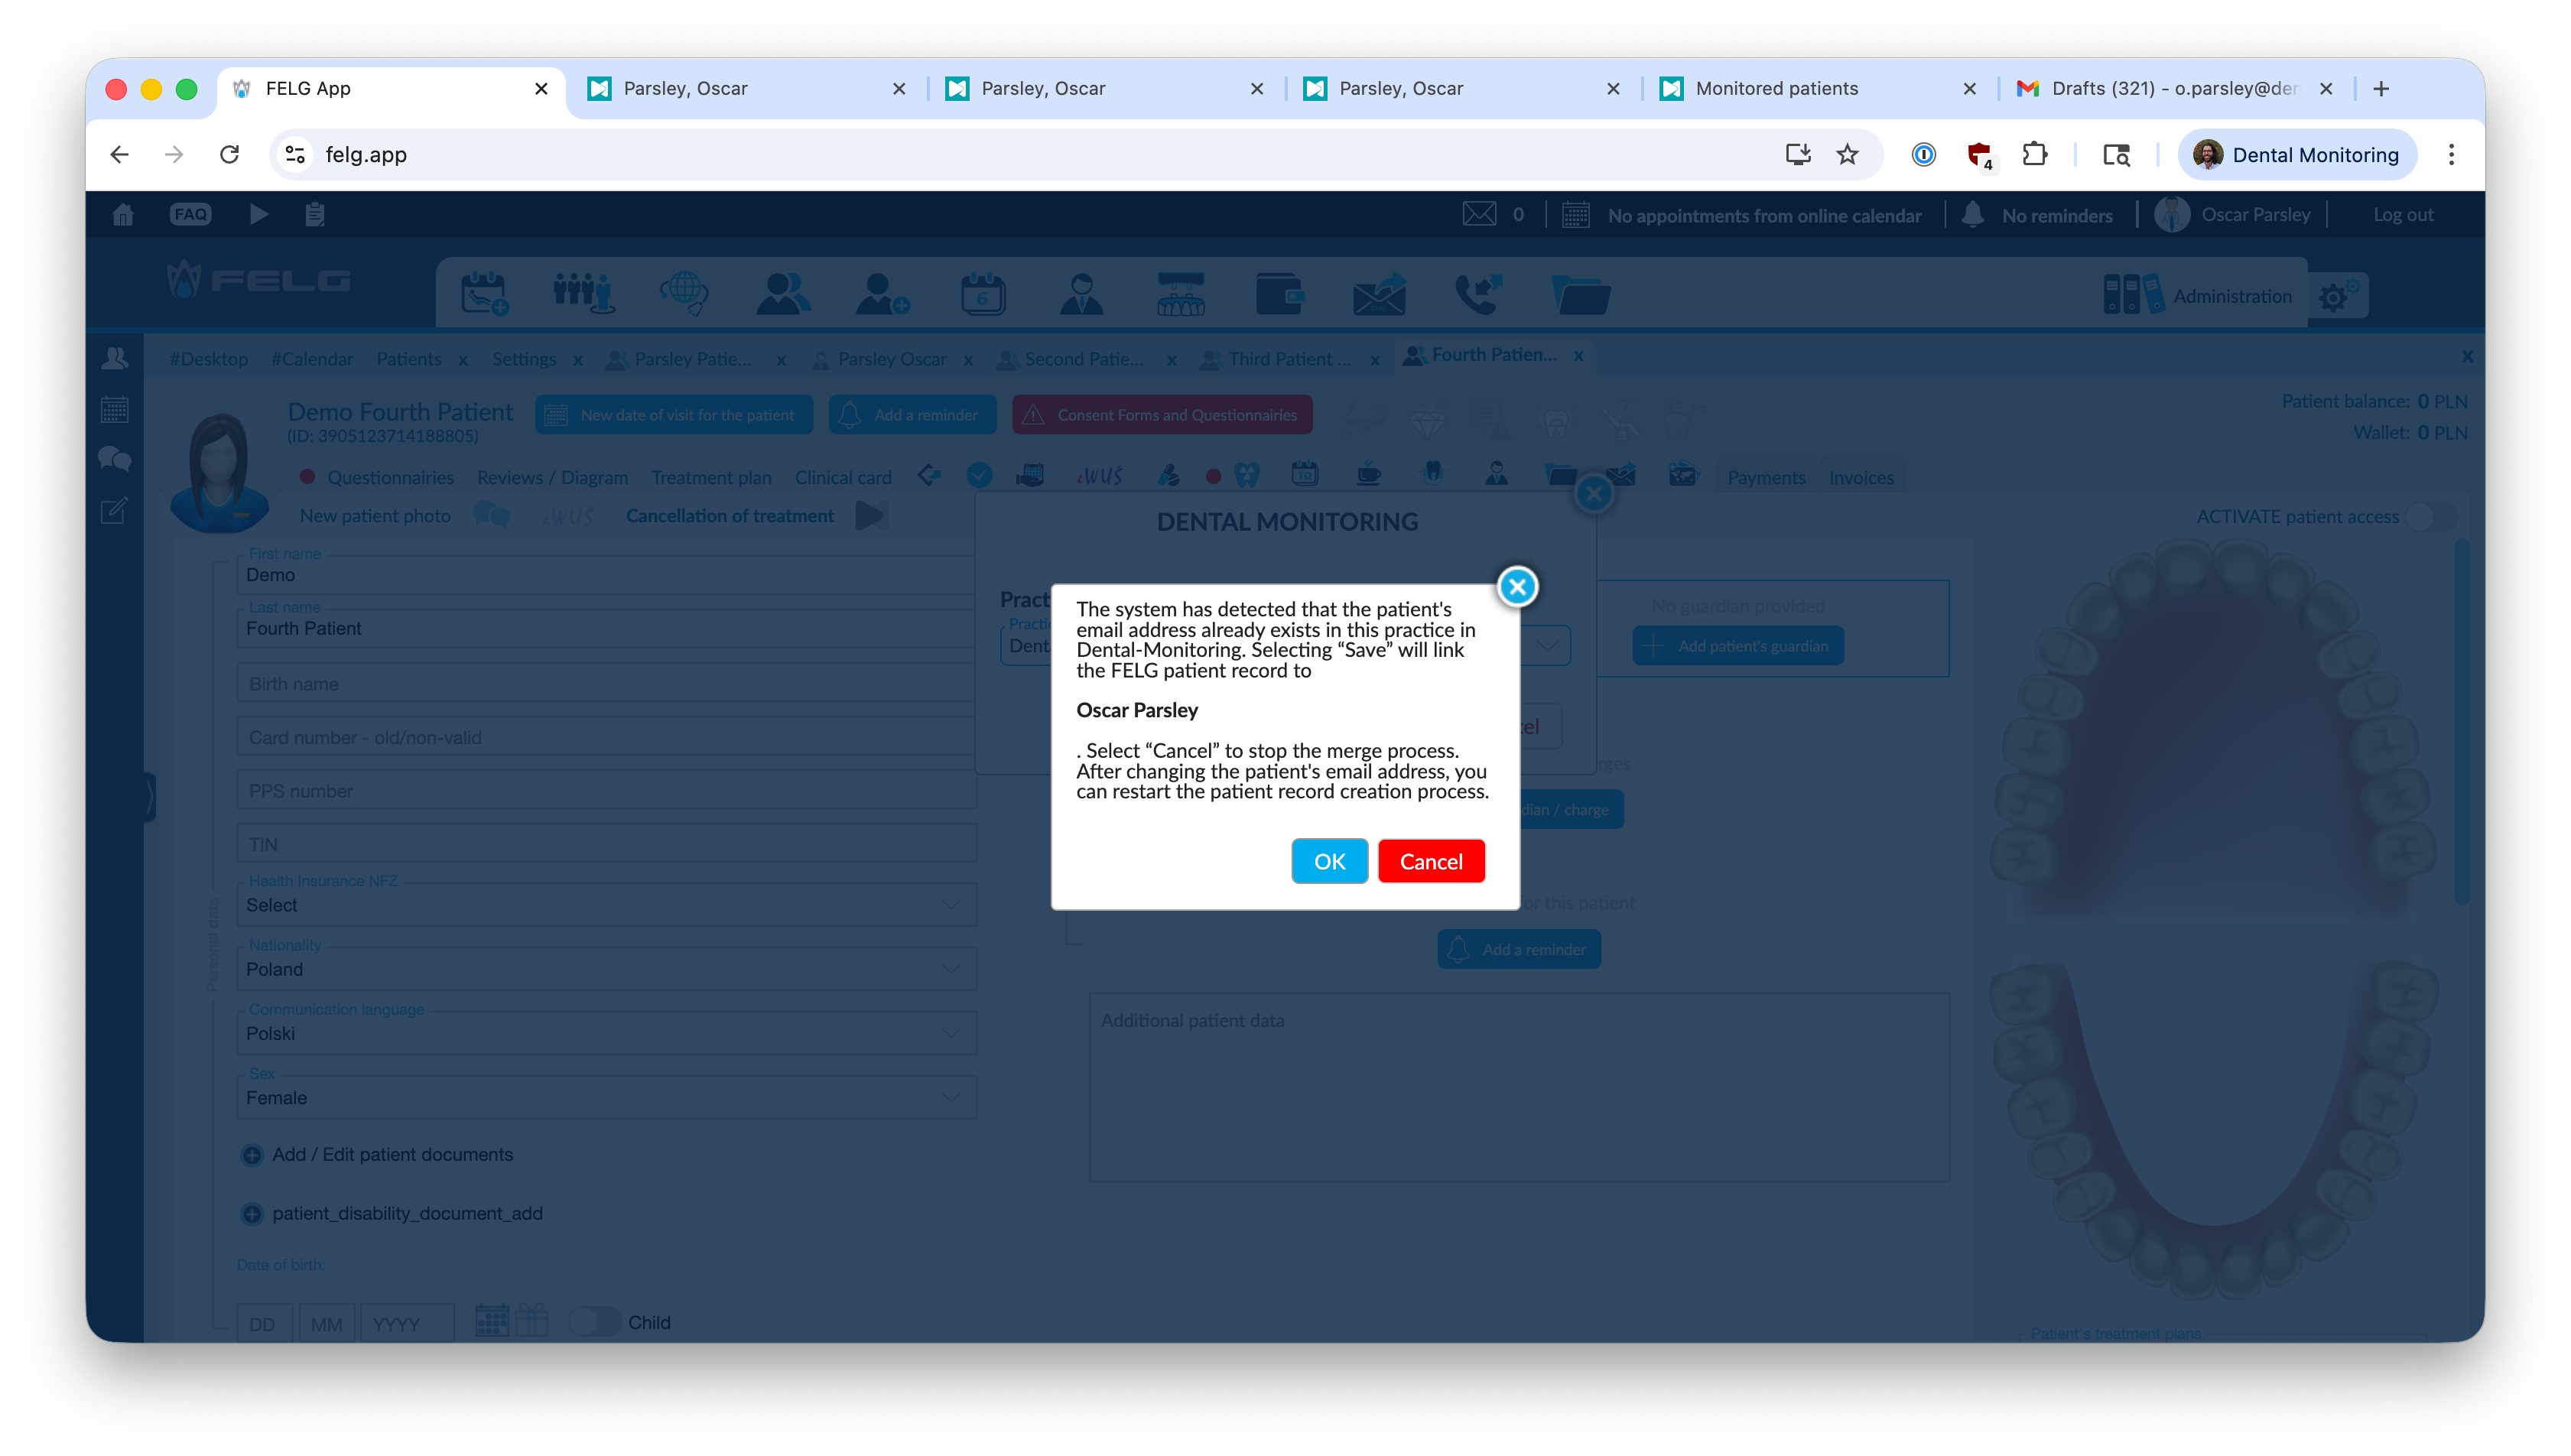
Click Ok, this FELG patient is now linked to the DM patient.
Un-syncing patients
Note that it is not possible to "un-sync" a patient from the FELG Dent interface.
If you have mistakenly synced a FELG Dent patient to the wrong patient in DM, please contact FELG Dent's support team.
Send Activation Link to Patient
To send an Activation Link (also known as a Login Link or a Magic Link) to the Patient:
- Navigate to the patient card in FELG Dent
- Click the DM icon at the top of the card
- Then click on
Send activation link e-mail to the patient

This will trigger the DM Dashboard to send an activation link by email to the patient.
Open DM Patient card
To open the DM Patient Card from the FELG Dent patient card:
- Navigate to the patient card in FELG Dent
- Click the DM icon at the top of the card
- Then click on
Open the DM patient profile
The will open in a new browser tab to the Patient card in the DM Dashboard.
Manage DM patient monitoring
Navigate to the Clinical Card of the patient record in FELG Dent, then click on Monitoring:
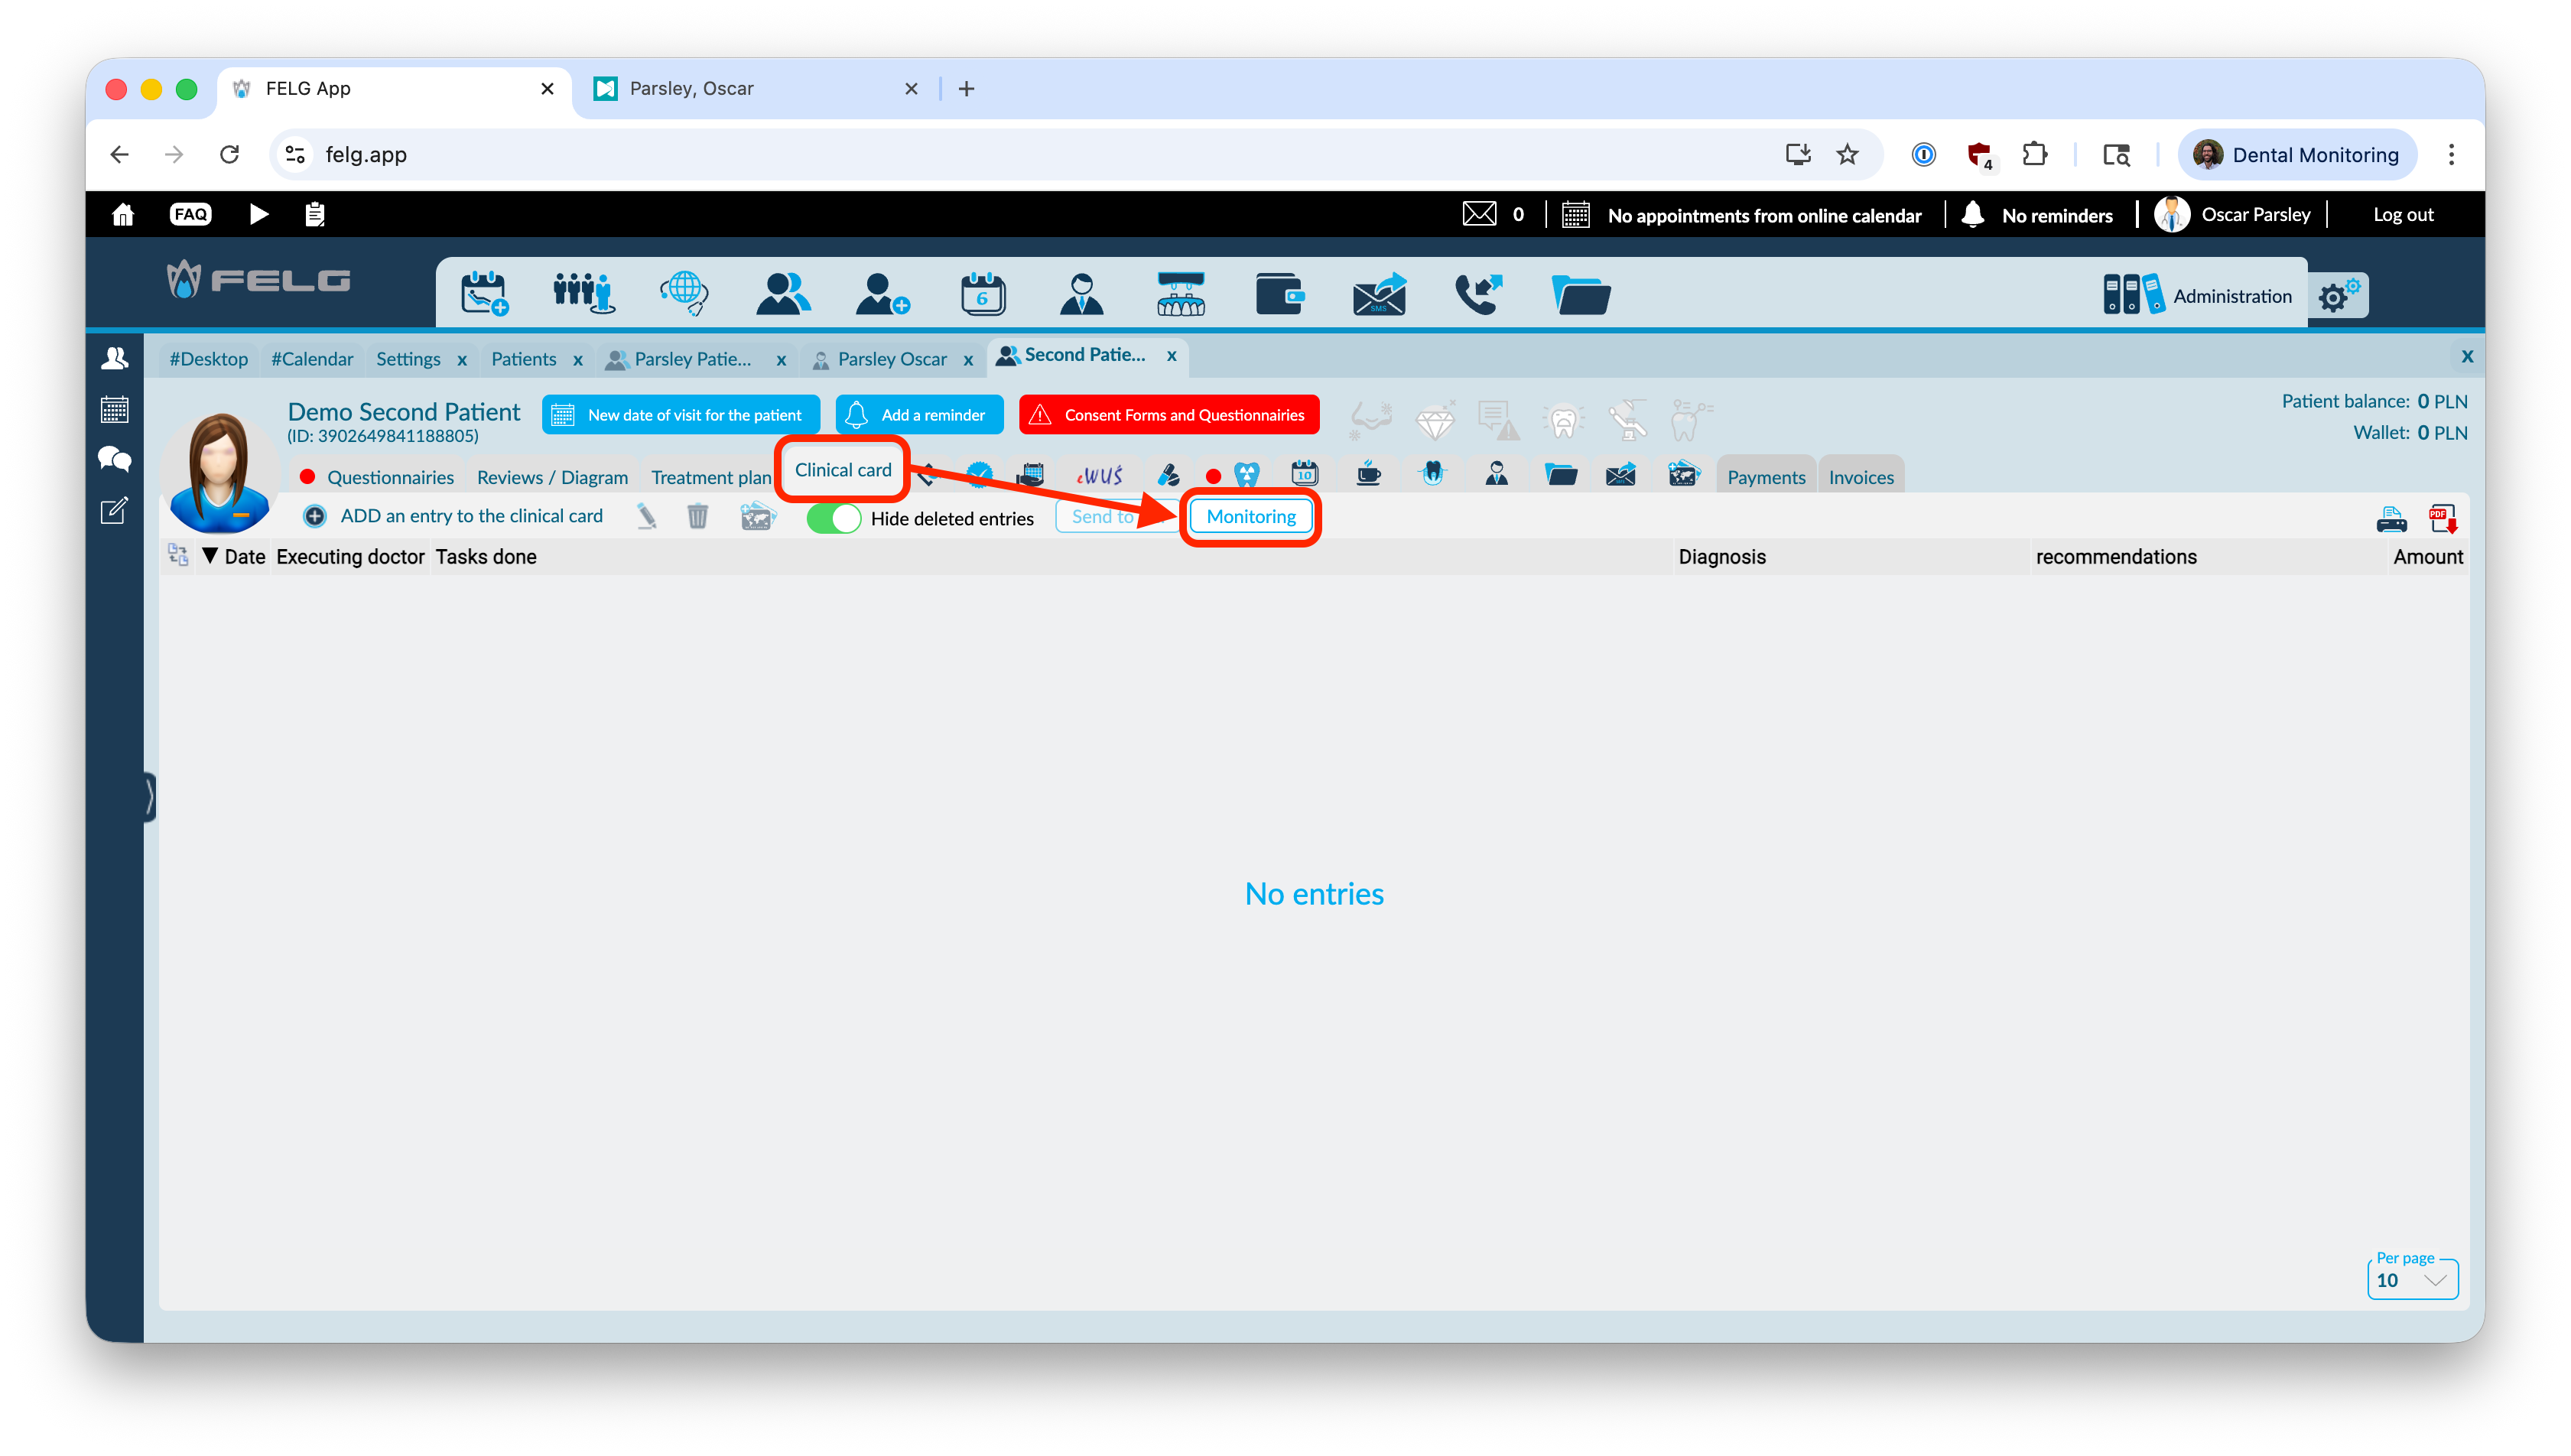
This opens the DM Monitoring window, from where you can either Start or Stop a patient's DM monitoring, depending on the current monitoring status of the patient.
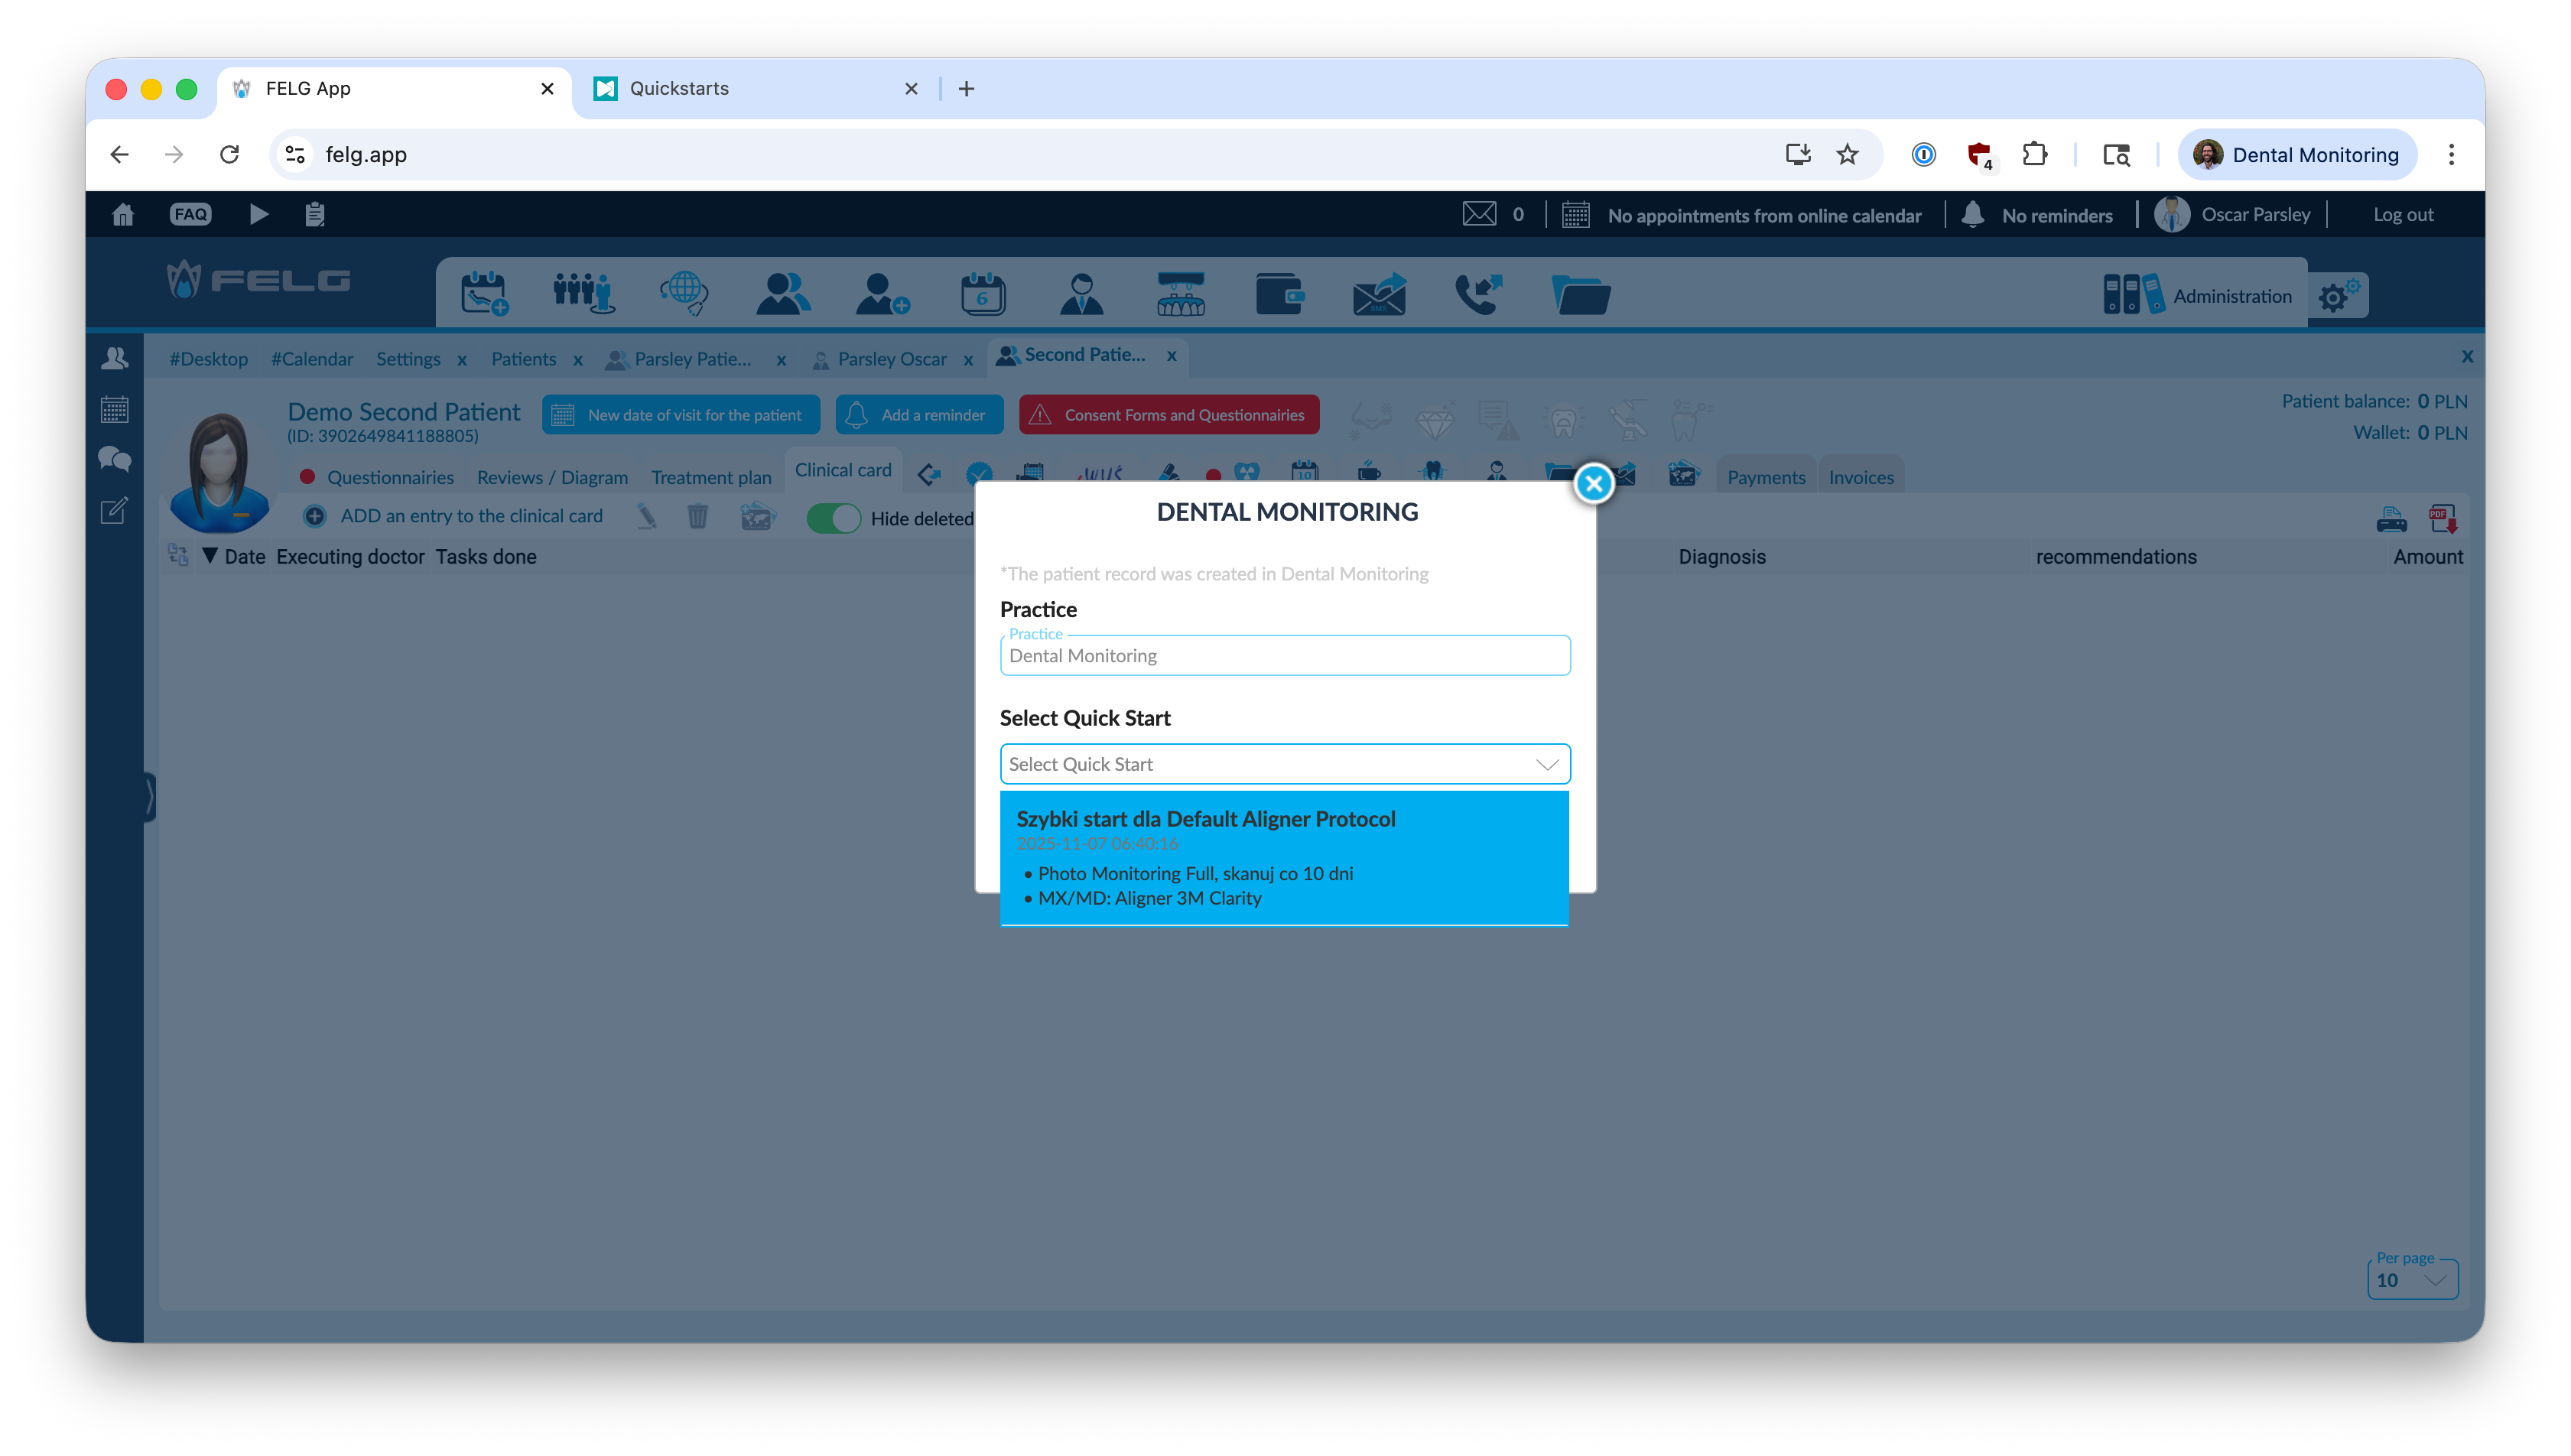
Start monitoring
To Start monitoring, first select a Quickstart from the list:
Then click on Start monitoring:
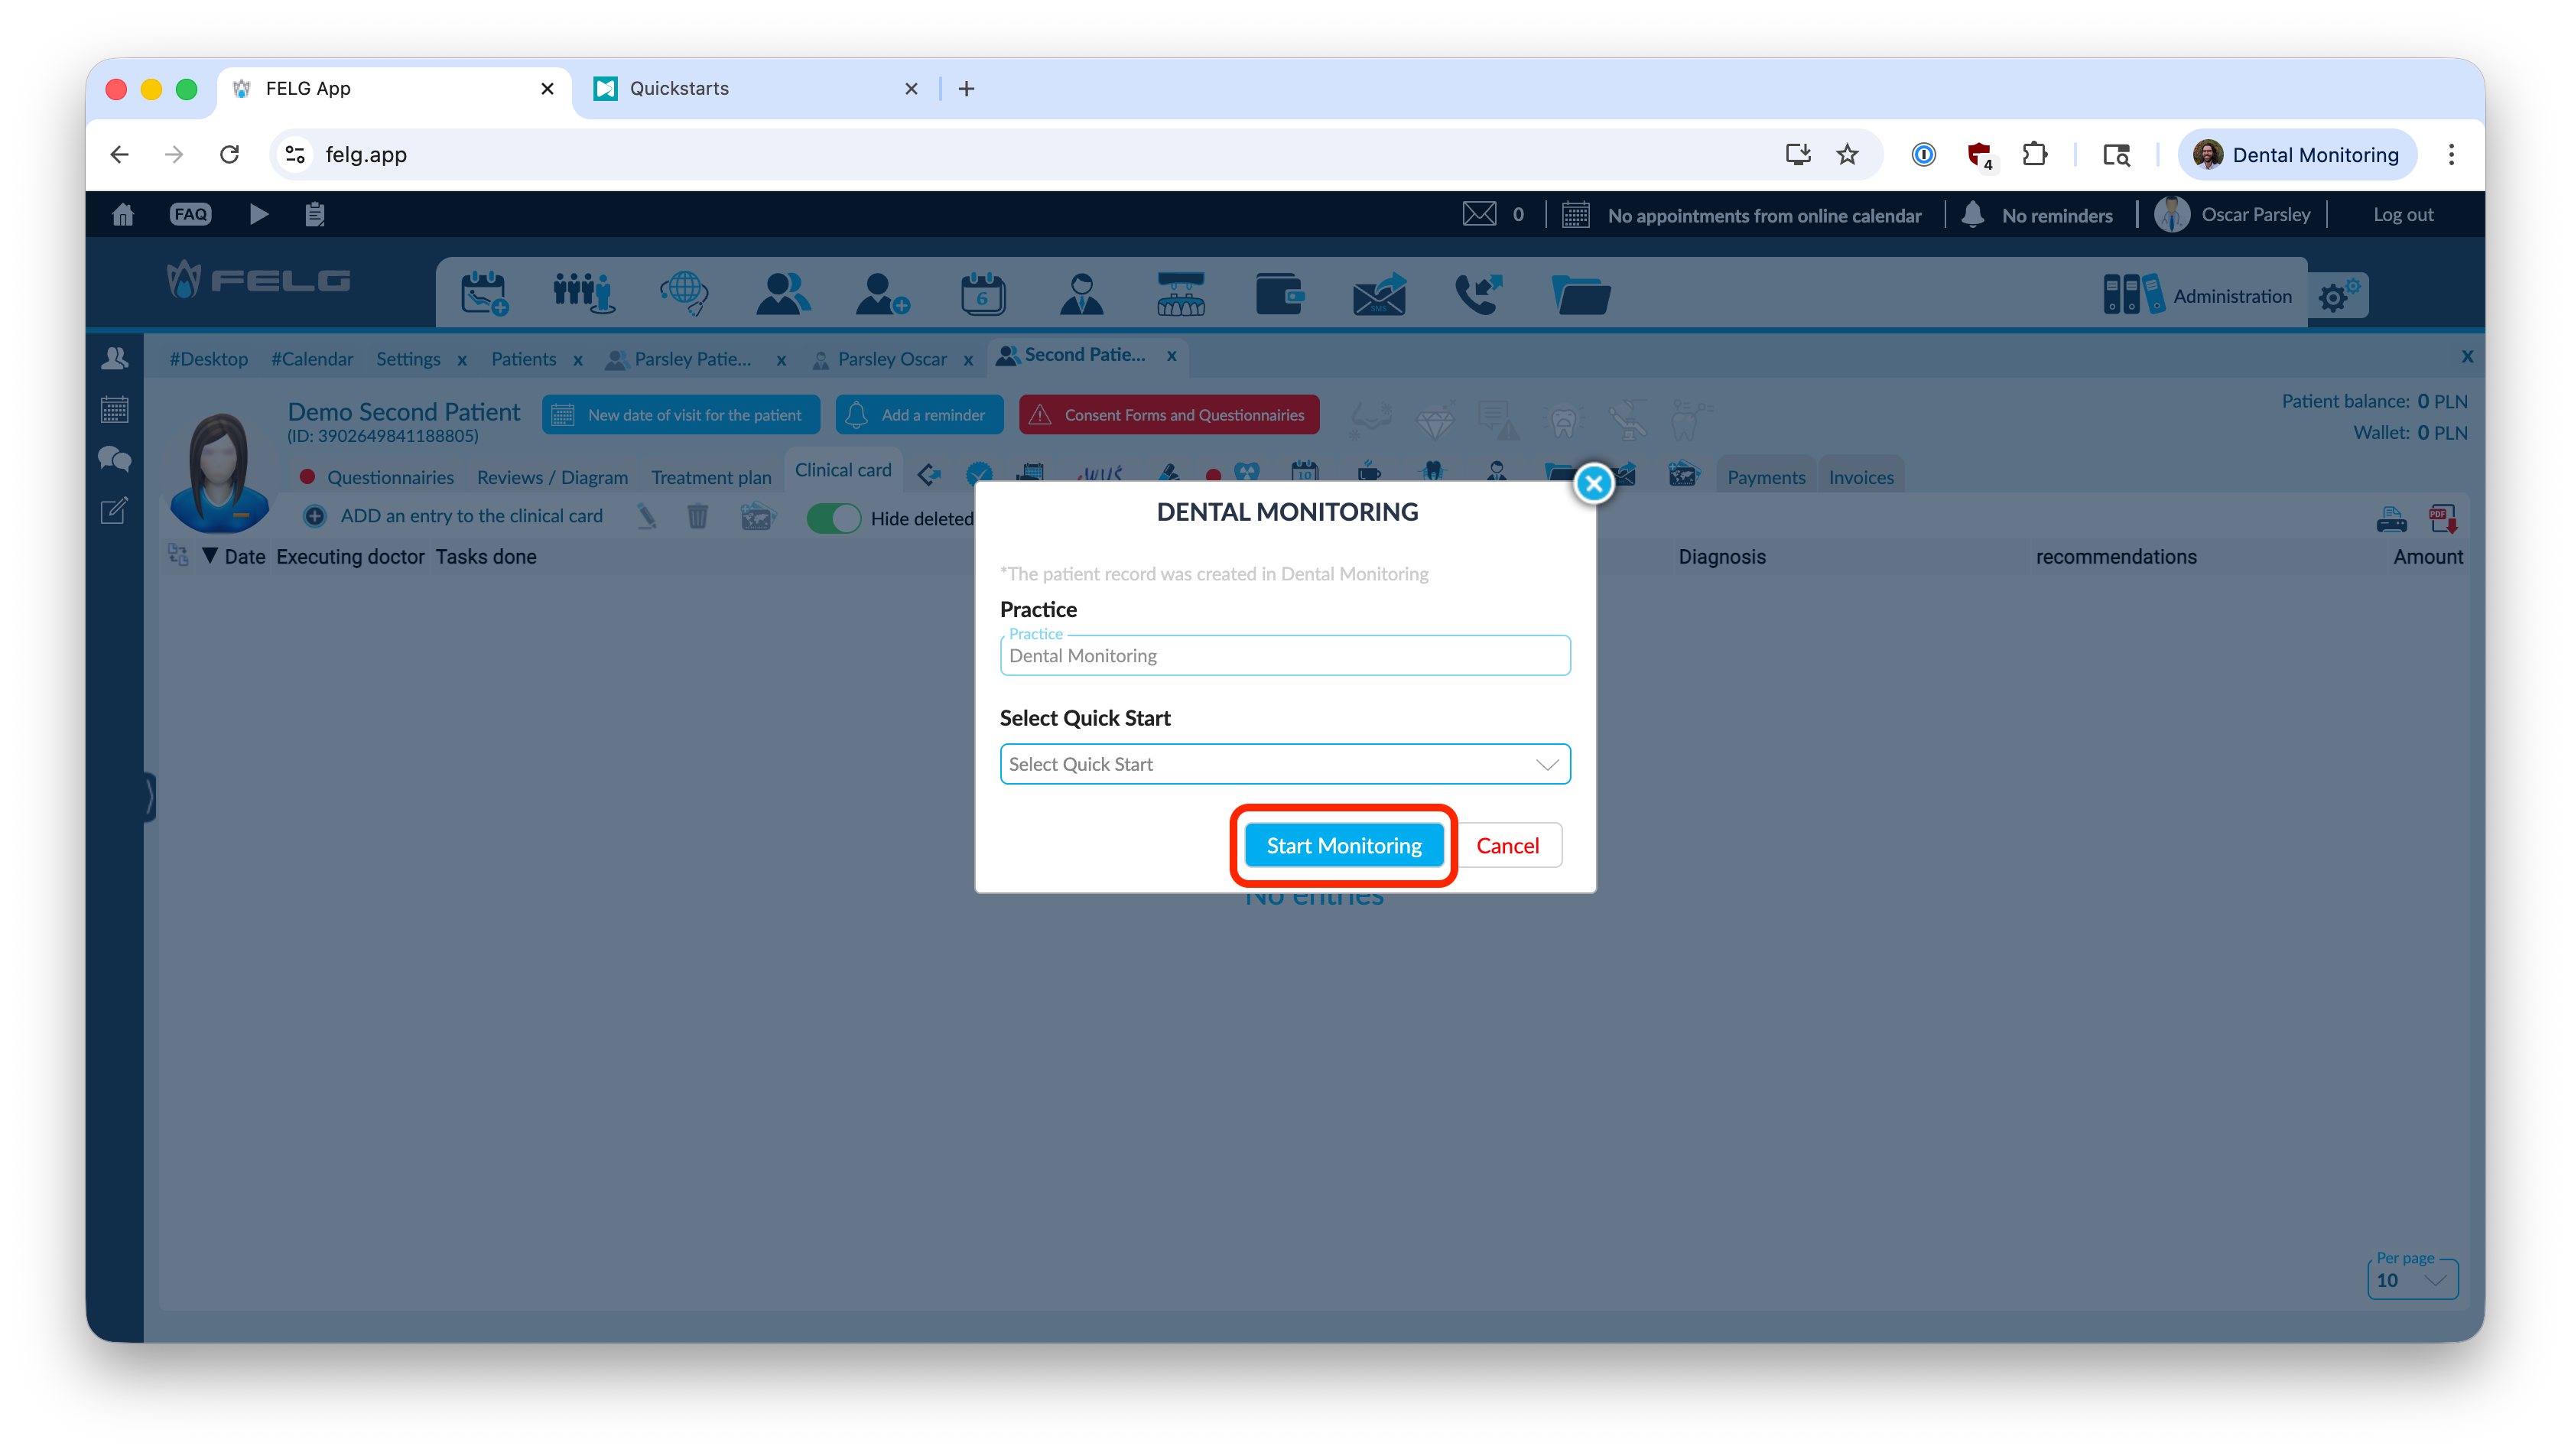
The patient is now started in DM with the selected Quickstart and can start scanning.
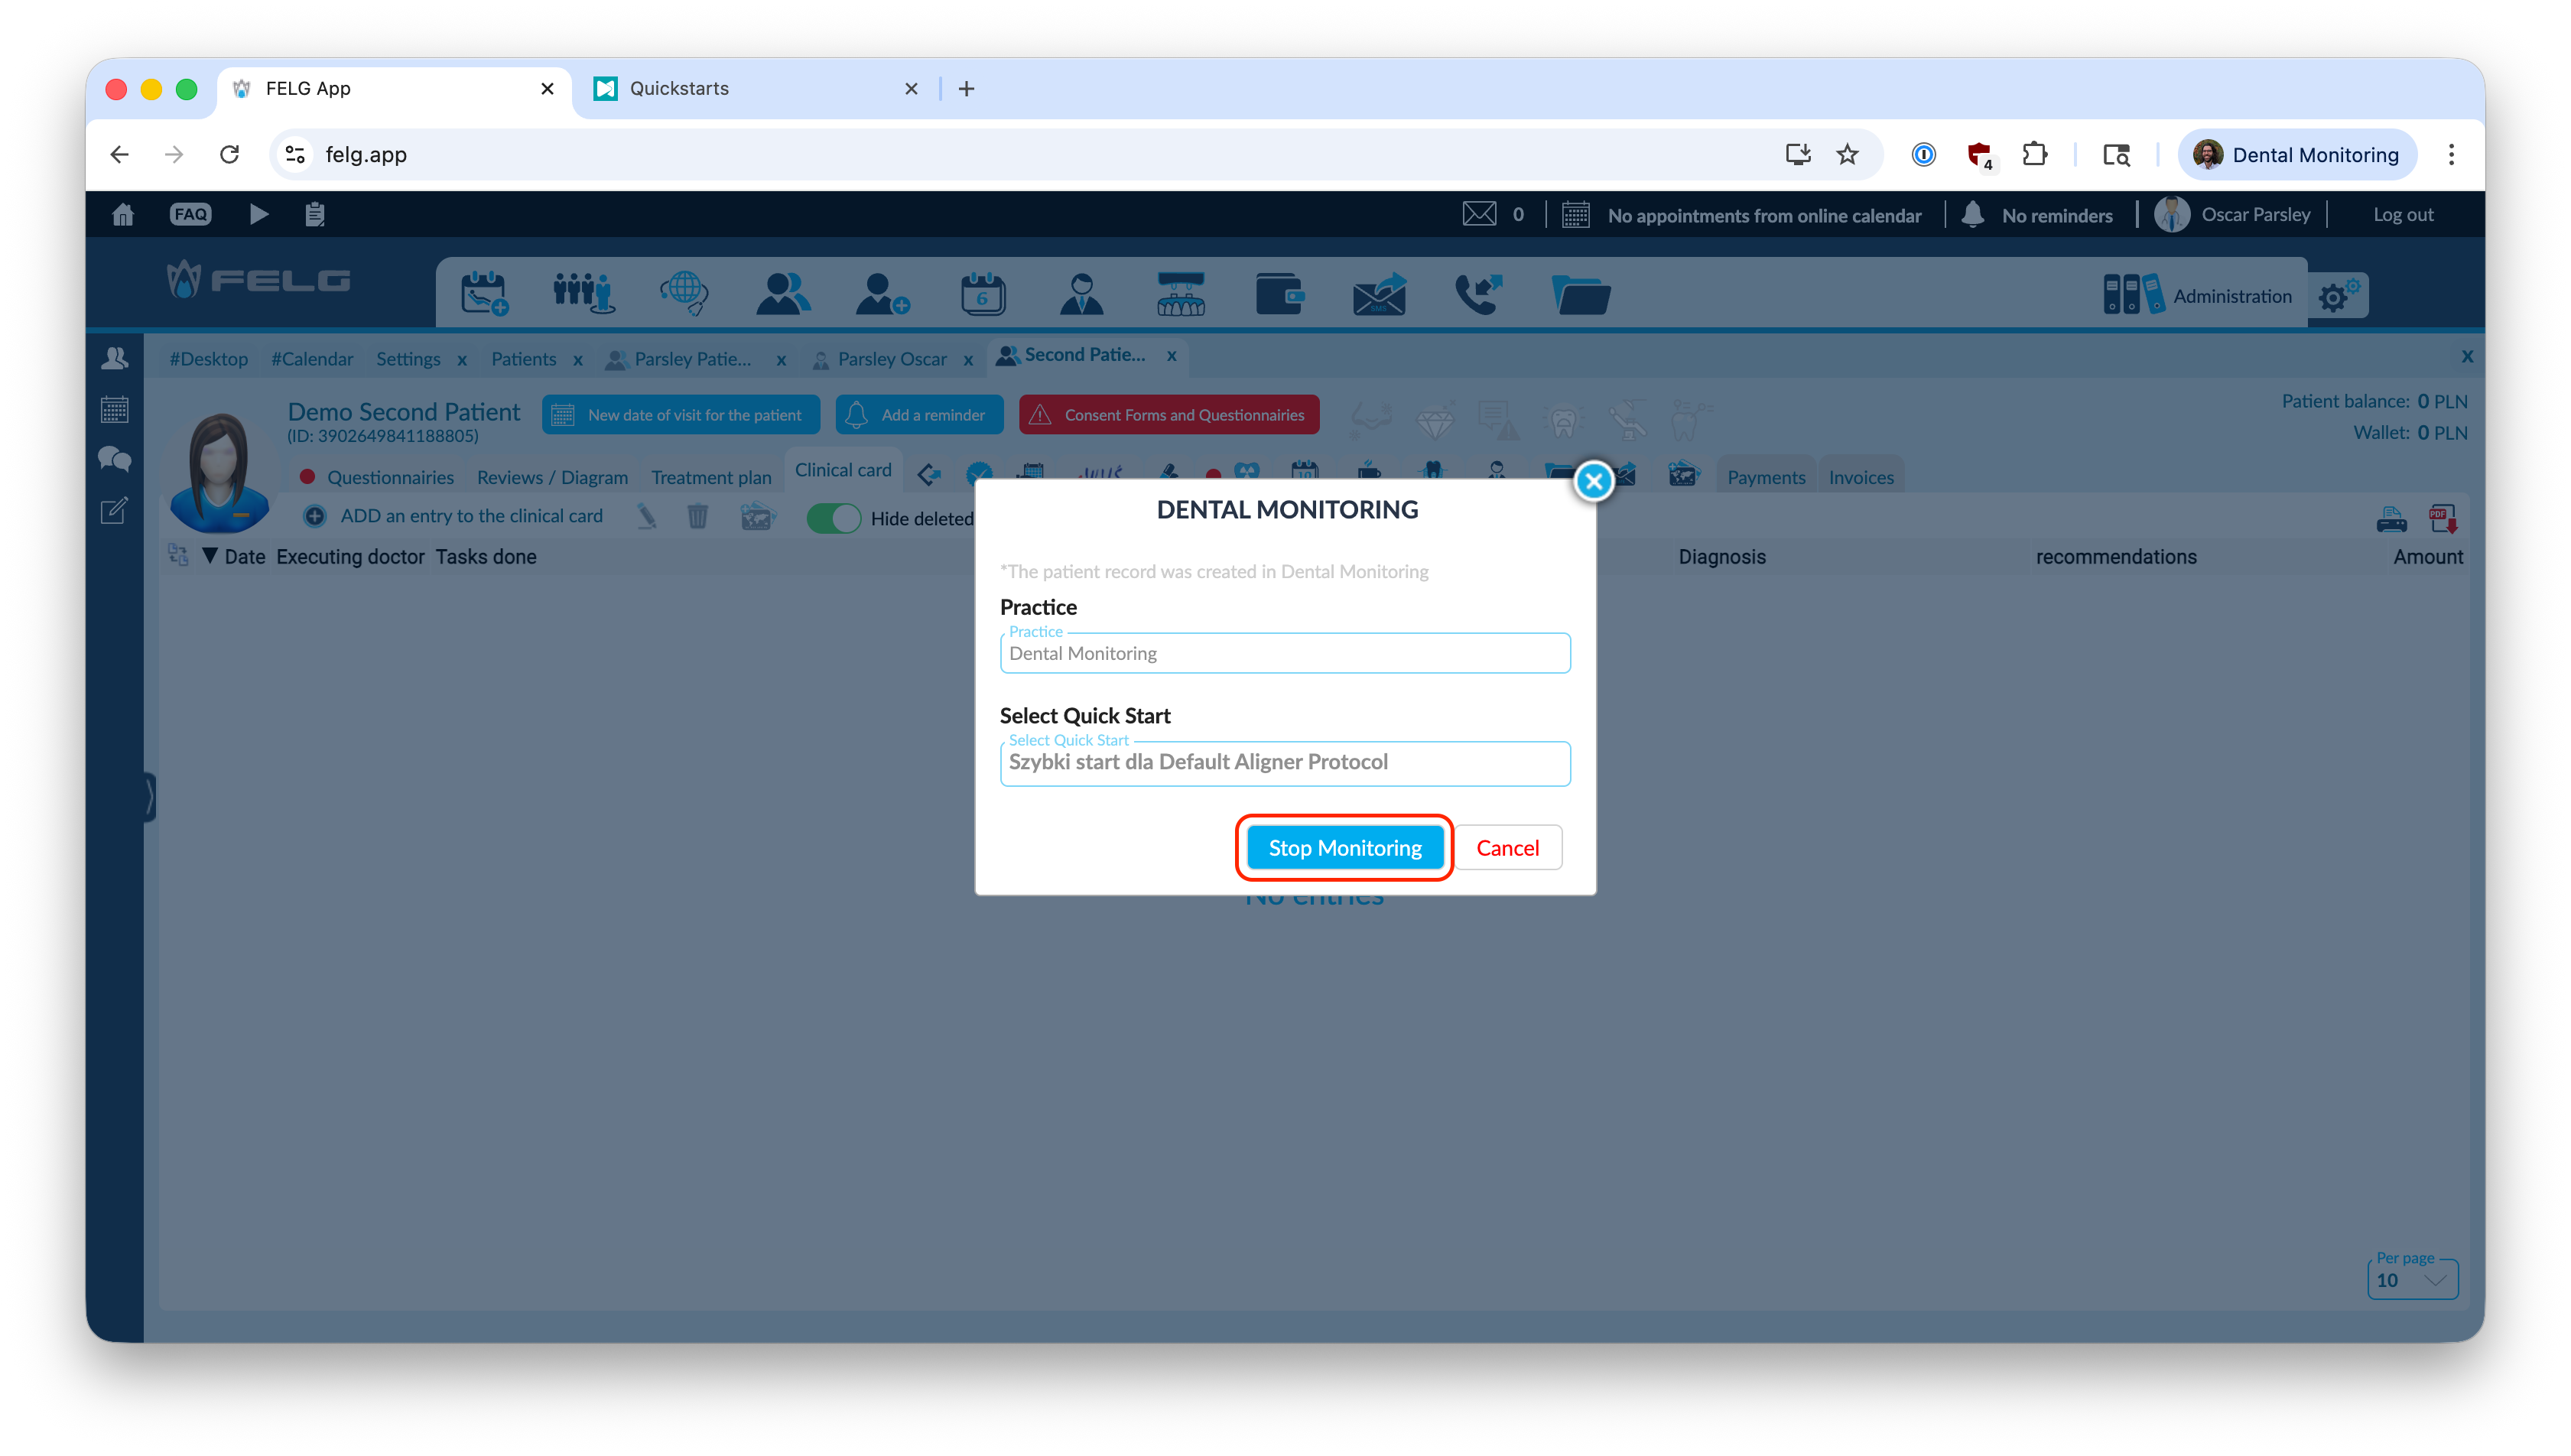
Stop monitoring
If a patient is already monitored in DM, the quickstart list will be greyed out and the button will say Stop monitoring
instead. Click Stop monitoring to stop the patient: